Databending in Audacity
Databending is the process of intentionally altering data in order to induce corruption for artistic reasons. Usually, this means screwing with image files to make them distorted in some way. Databending makes much more authentic "glitchcore" than anything you can do in a typical image editor, and you don't even have to understand anything about computers to do it (I sure don't!)
This article is a step-by-step guide to databending images using Audacity, a free audio editing program. Audacity can actually import things that aren't supposed to be audio, such as images, and from there you can use the program's built-in effects menu to manipulate the data. When you translate the altered audio back into an image file, you get a glitchy, distorted picture, with the exact manner of distortion determined by what effects you applied in Audacity.
I owe a huge debt of gratitude to Jojo Decamarks, whose excellent guide is how I learned to databend like this in the first place. The process of how to actually get the images in and out of Audacity as described in this article is basically yanked wholesale from Jojo's guide, with the addition of some extra screenshots and notes designed to help out people like me who are chronically unable to follow computer-related instructions unless they get walked through every single step.
The second part of this article is all original documentation of how Audacity effects translate to image distortion. As far as I know, nothing else like this exists on the internet, so I hope it will be a useful resource to anyone who wants to get into databending without fussing through hours of trial-and-error to get the results they want.
Image Preparations
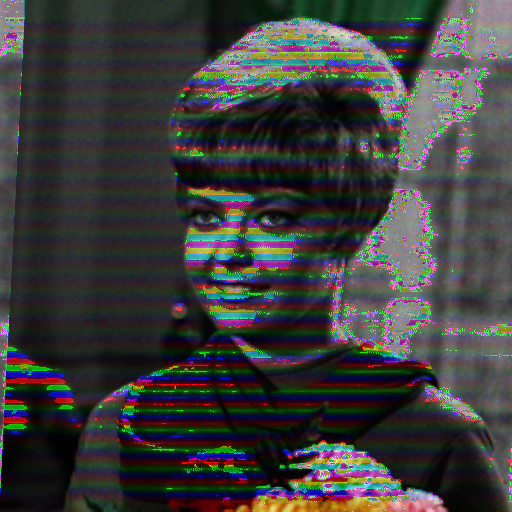
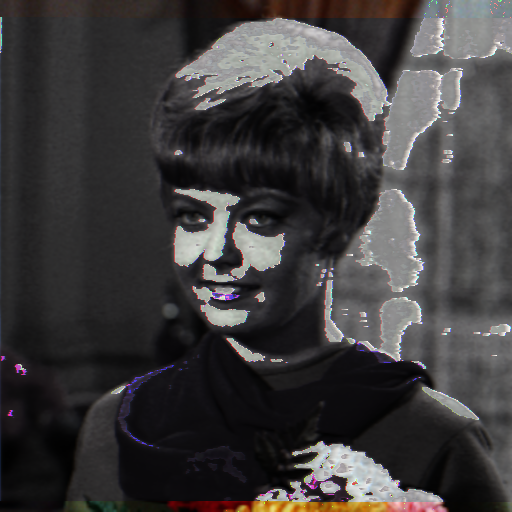
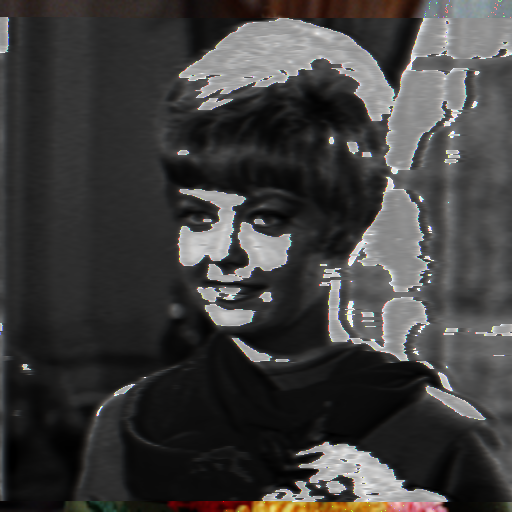
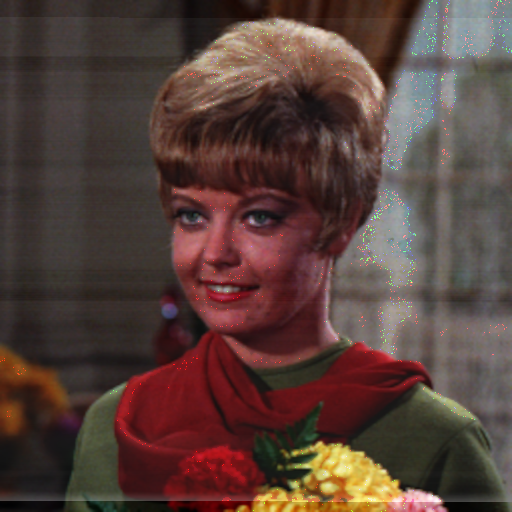
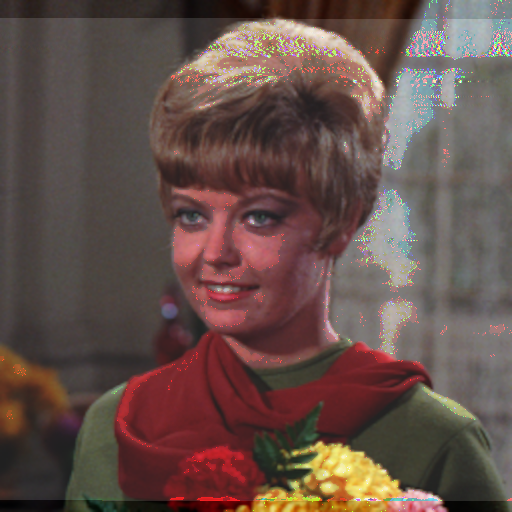
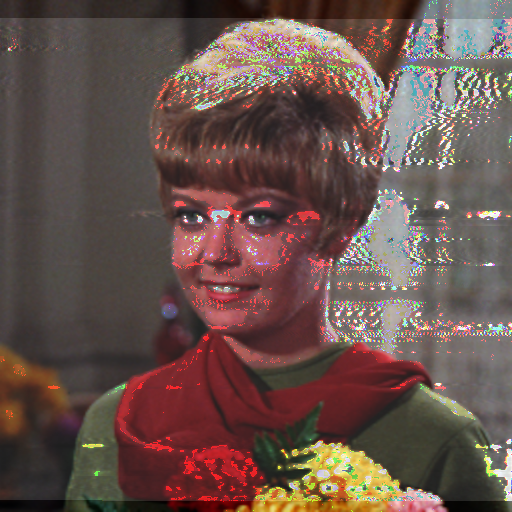
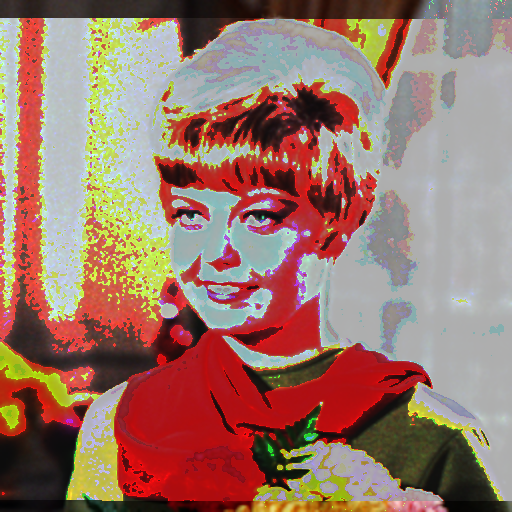
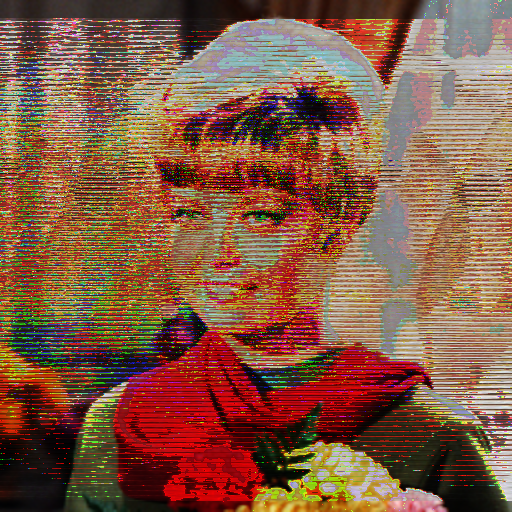
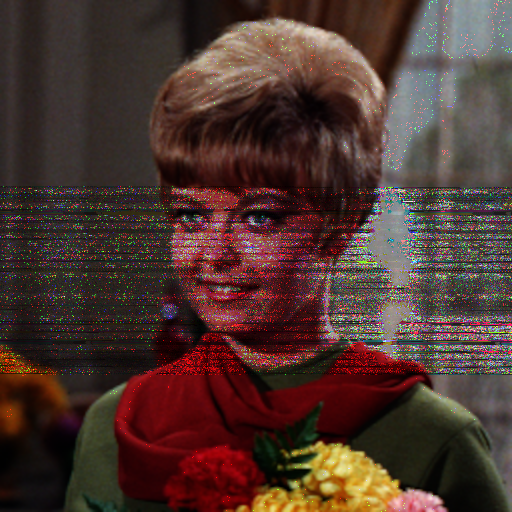
For this article, I'm using a standard test image to demonstrate every effect; this is '"Female" (NTSC test image)' from the USC SIPI Image Database.

all the women with names have been removed from the database, leaving only three "female"s, of which this is one
Downloaded straight from the database, "Female" is a 256x256 .tiff image. I imported it into GIMP and upscaled it to 512x512 (cubic interpolation) because I felt like 256 pixels was a little small for properly showing off databending effects.

computer, enhance!
You can databend virtually any static image you want using this method, with the caveat that it doesn't have a transparent background. This method requires the image file to be a 24-bit .bmp, which doesn't have an alpha (transparency) channel. If your desired image has complicated transparency effects, you will have to come up with some alternate solutions, like putting it on a white background and using "multiply" blend mode in an image editor to overlay it on something else.
Anyway. Export your image with these settings:
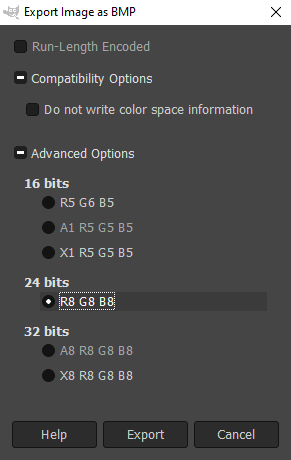
- Run-Length Encoded: no
- Do not write color space information: no
- 24 bits: R8 G8 B8
I know for sure that this works in GIMP; I haven't been able to make it work in Krita. According to the guide linked above, it also works in MS Paint, but I haven't tested that myself. I have no idea about other image editing software, so if you can't get the right export settings in your program of choice, uhh, download GIMP and do it there instead? It's free. How have you made it this far in life without having downloaded some version of GIMP?
Now that you have your .bmp image, you can transmute it into audio data and get to bending.
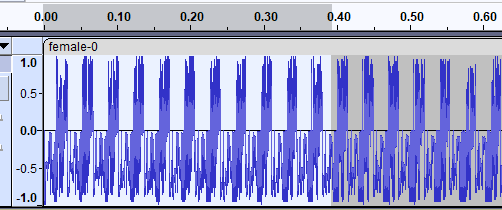
Importing
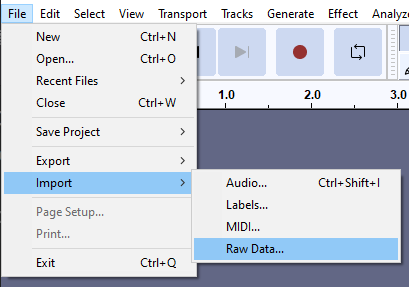
Open Audacity (I'm working in version 3.2.0) and select File > Import > Raw Data...
Click on your .bmp image in the file explorer. You will see this menu pop up; don't just mash past it!
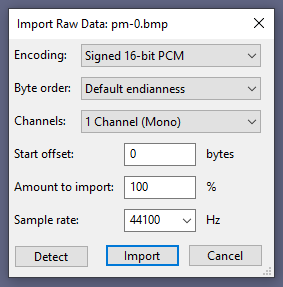
You have to set it to these particular settings:
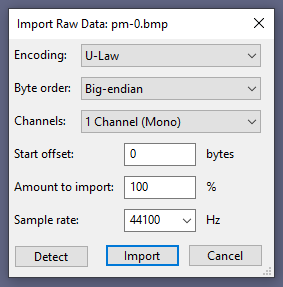
- Encoding: U-Law
- Byte order: Big-endian
- Channels: 1 Channel (Mono)
- Start offset: 0 bytes
- Amount to import: 100%
- Sample rate: 44100 Hz
Then hit import. Now you have audio data visible in the main Audacity interface.

Precautions
When editing, you have to be a little bit careful not to distort the whole file. The very beginning and end of the data have to stay as they are, or else the whole thing will get corrupted and fail to save as an actual image.
Presumably, this is where things like image resolution and bit depth are stored -- I don't actually know anything about how images are encoded, so I'm just guessing. Regardless, if you mess with these areas it will effectively turn the file into gibberish and your computer will throw its hands up and go "I dunno, man, I can't read this."
i guess computers use 'we' pronouns these days
Because it's not always clear where exactly the limit is, and I didn't want to fiddle with getting it exactly right, the example images in this article will usually have a band of unaltered pixels at the top and bottom. If you want to make really sure you get your whole image in the databending space, you can just add some buffer pixels to the top and bottom edges before converting to .bmp.
The rest of the file is pretty much fair game, as long as you don't push it too far.
Exporting
Once you've manipulated the audio to your heart's content, you need to turn it back into an image file. Go to File > Export > Export Audio...
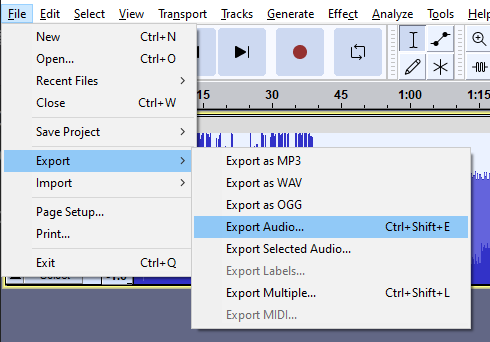
The default setup of this menu can change depending on what you last did in Audacity -- for example, if you're using it for actual music, the default export settings might be .mp3 or .oga or whatever. Change it to these settings:
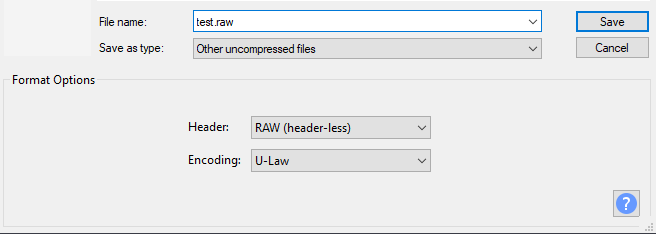
- Save as type: Other uncompressed files
- Header: RAW (header-less)
- Encoding: U-Law
It will automatically change the file extension to .raw when you select "Other uncompressed files". Make sure you go back to the name box and set it to .bmp.

You'll get jumped by a warning message telling you some programs won't open files with nonstandard extensions.
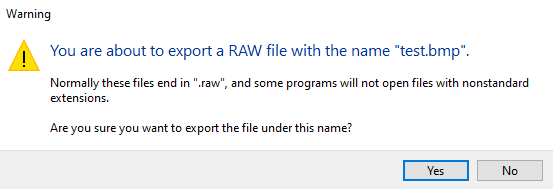
But you know what you're doing, so just hit "Yes" to skip past this. You also might get a prompt to edit metadata tags. I don't know if editing these has any effect on the resulting image file (probably not) so just clear them all and press "OK". You can tick the box at the bottom to stop the metadata menu from showing up every time.

Now you have a new .bmp file ready to play with! Assuming it didn't get corrupted, you can open it in any image viewing or editing program that takes .bmp. As long as it stays a .bmp with the same encoding settings, you can throw it back into Audacity and mess with it even more, or you can re-save it as a .png and use it for whatever other purposes.
Okay, now let's get into the fun part: how do different audio effects translate to image effects?
Effects
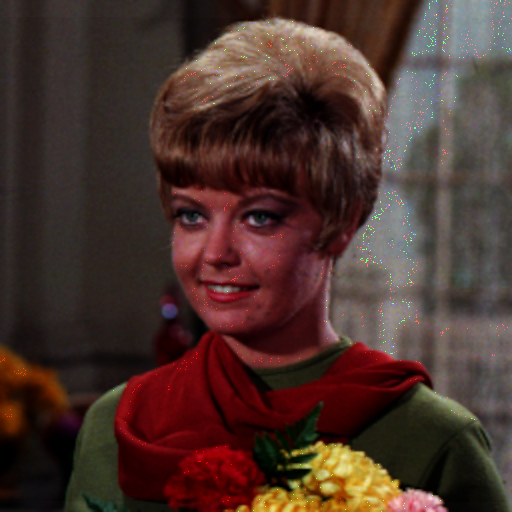
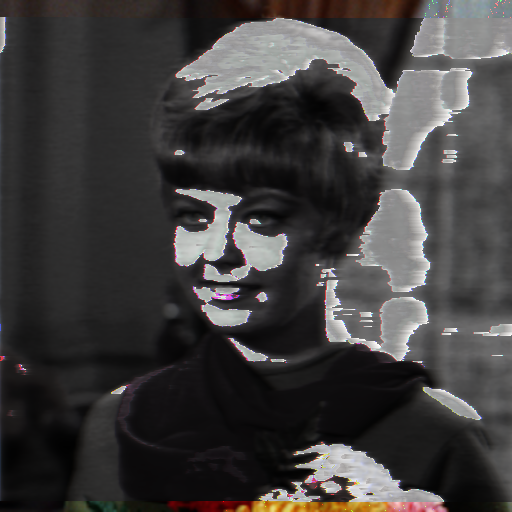
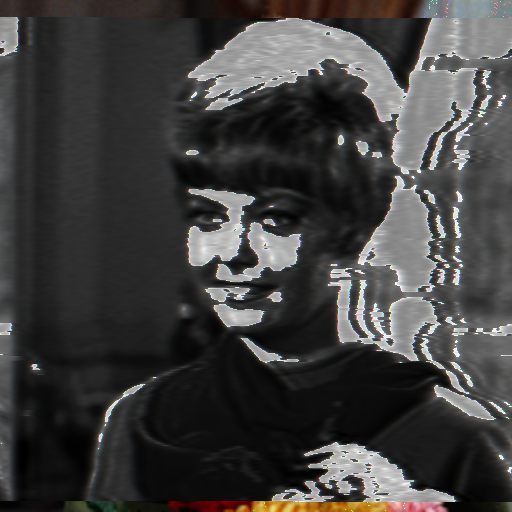
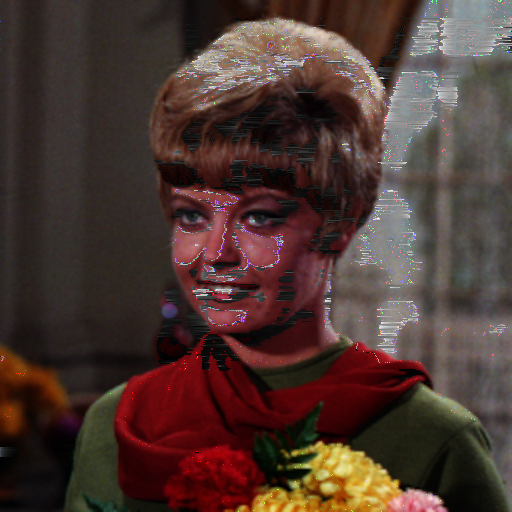
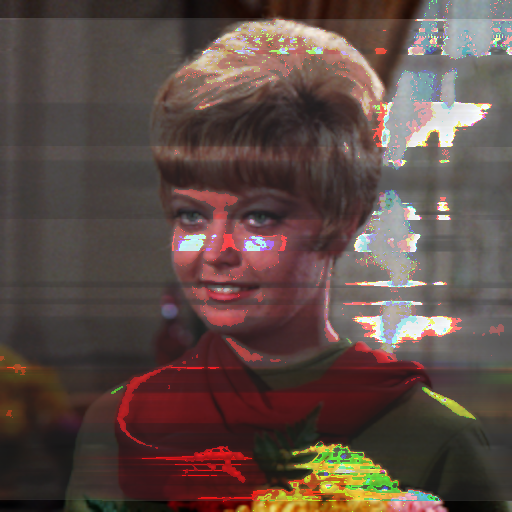
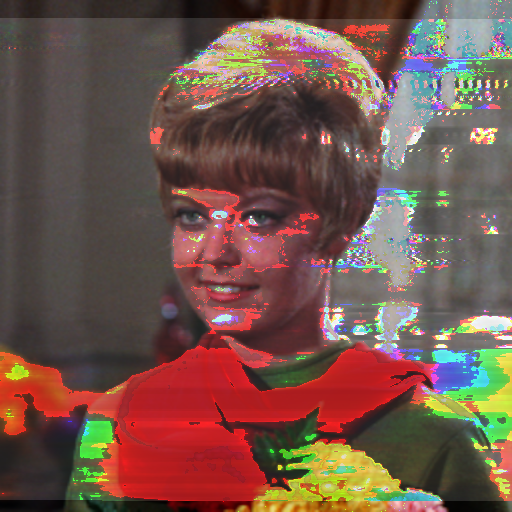
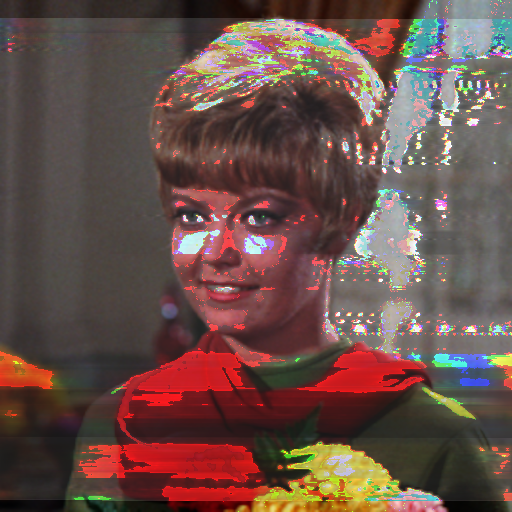
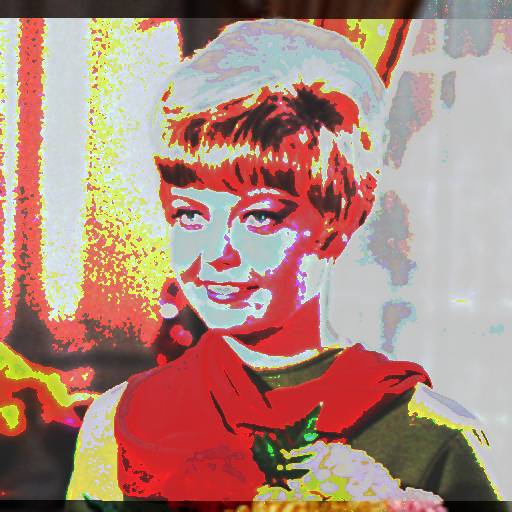
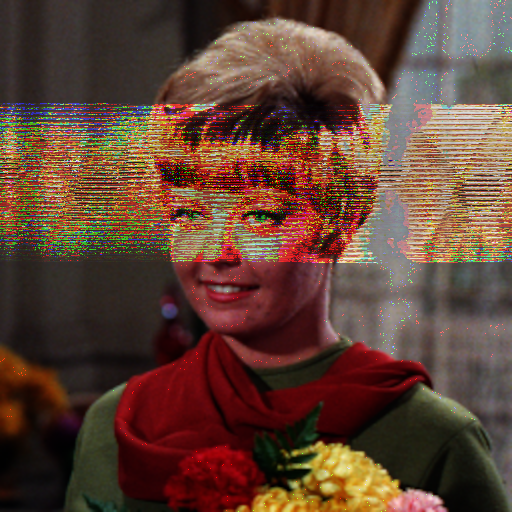
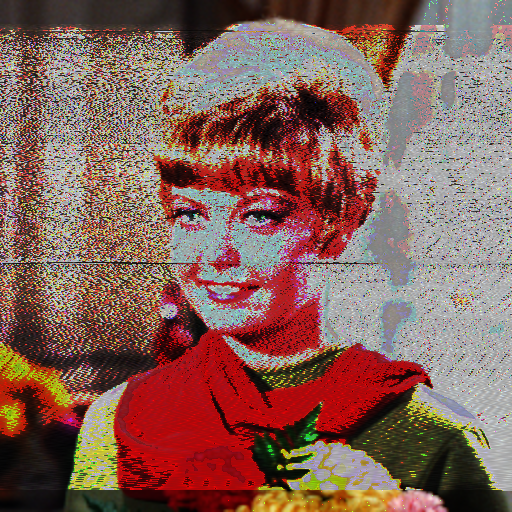
Actually one more thing. Just importing and exporting a .bmp into Audacity will distort it a little bit, even if you don't touch the audio data at all. For example, here's "Female" as it looked fresh out of GIMP compared to how it looks after passing through Audacity ostensibly untouched:
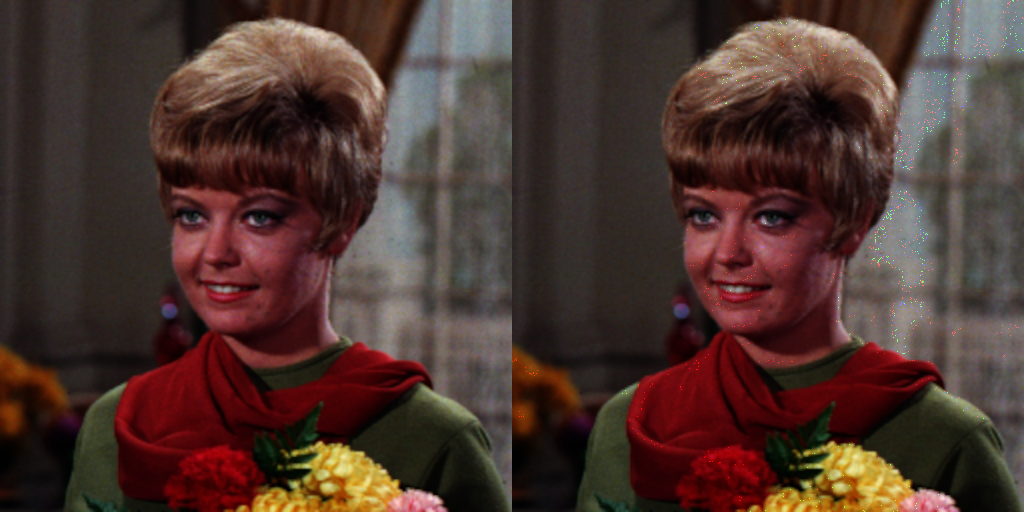
Anyone who actually knows how computers work is free to tell me how / why this happens.
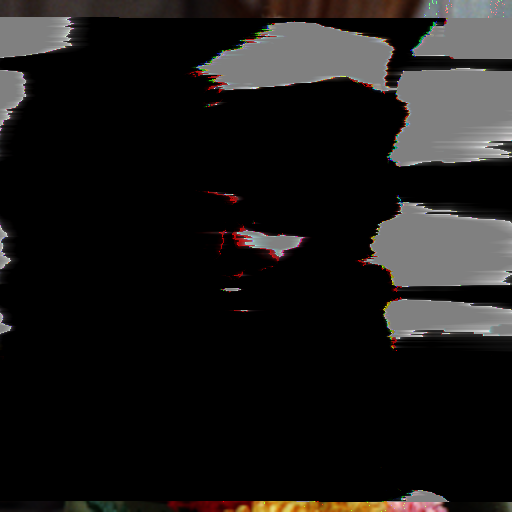
Amplify
Increasing amplitude makes the image darker, decreasing amplitude makes the image lighter. Simple as.
| +1 dB | +3 dB | +10 dB |
 |
 |
 |
| -1 dB | -3 dB | -10 dB |
 |
 |
 |
As far as I can tell, there is no upper or lower limit to this one. I went all the way to +50 dB, the maximum Audacity would let me do at once, and it still made a valid image file. I assume that at some point you'll end up with a completely black image, which isn't very interesting, but it's still technically within the bounds of "valid image". Going 50 dB in the other direction makes a very washed-out image, and presumably leads to a completely white or grey one as the amplitude approaches total silence.
| +50 dB | -50 dB |
 |
 |
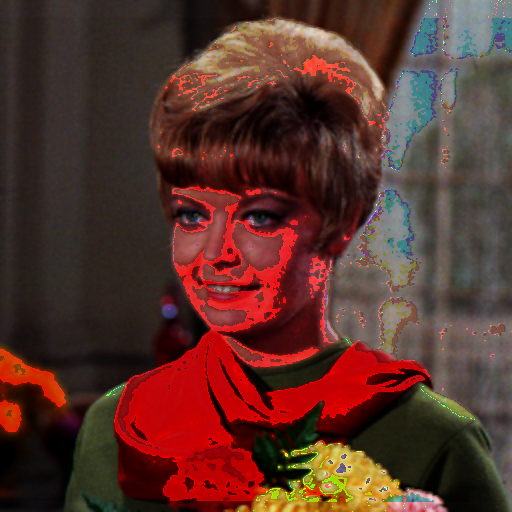
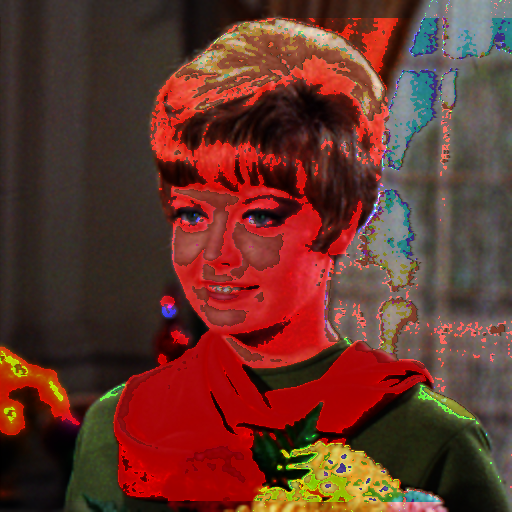
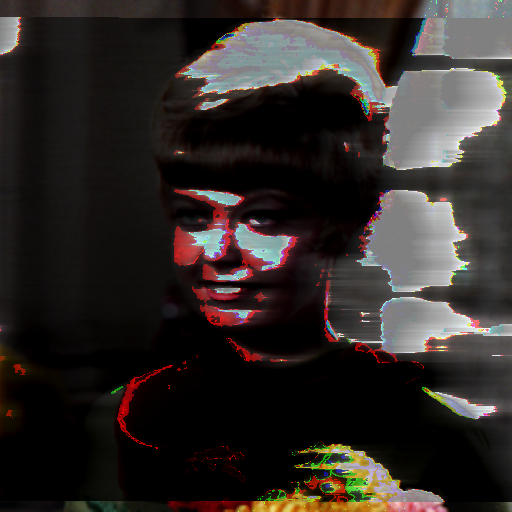
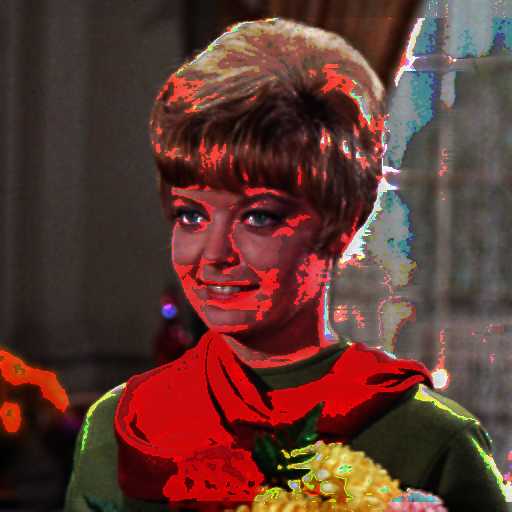
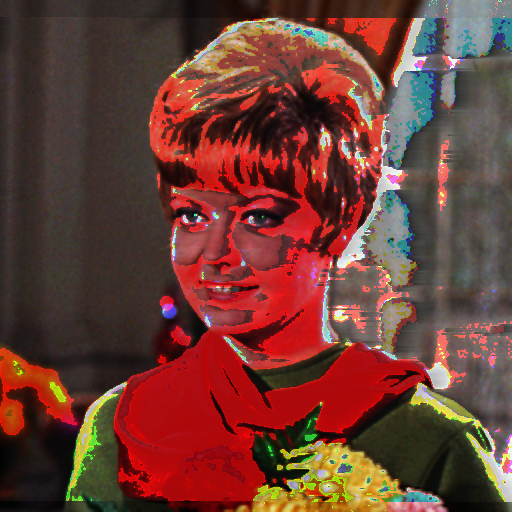
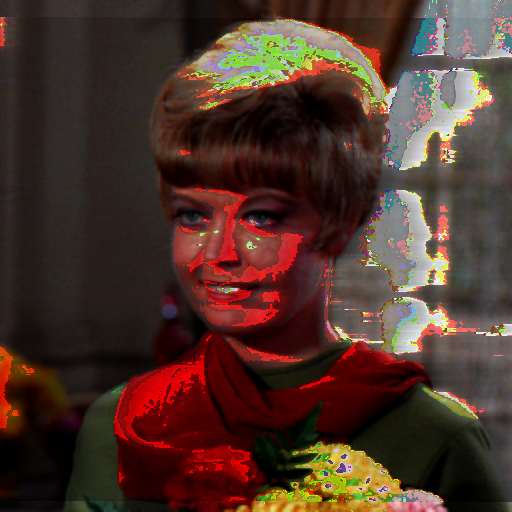
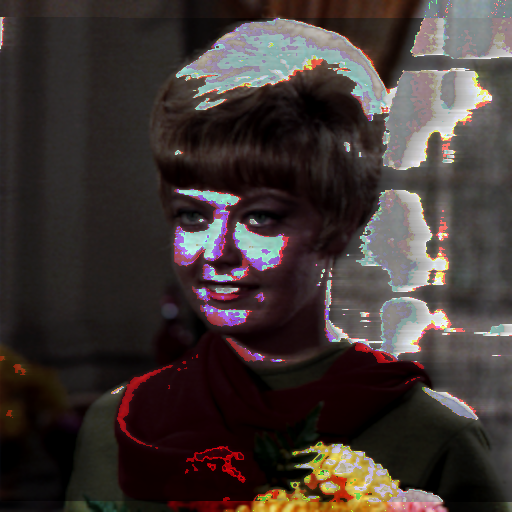
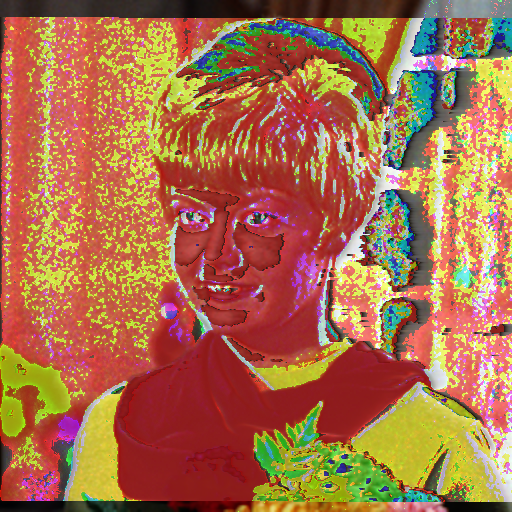
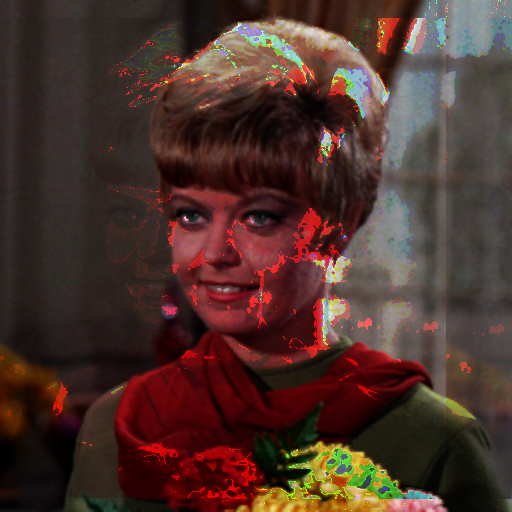
Bass and Treble
Increasing treble makes the image redder and more saturated. Decreasing treble makes the image cyan-er and less saturated. Increasing bass increases both red and cyan while also making the image darker and adding a slight smearing effect. Decreasing bass has similar effects to increasing treble plus making the image lighter and less saturated.
| +1 Treble | +3 Treble | +10 Treble |
 |
 |
 |
| -1 Treble | -3 Treble | -10 Treble |
 |
 |
 |
| +1 Bass | +3 Bass | +10 Bass |
| (corrupted) | 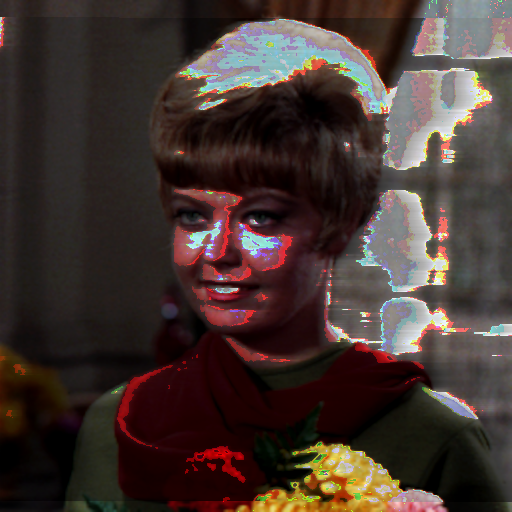 |
 |
| -1 Bass | -3 Bass | -10 Bass |
 |
 |
 |
| +3 Treble, +3 Bass | -3 Treble, +3 Bass |
 |
 |
| +3 Treble, -3 Bass | -3 Treble, -3 Bass |
| (corrupted) | 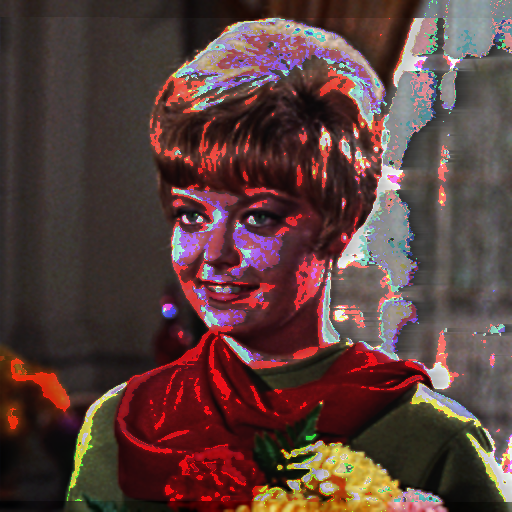 |
| +30 Treble | -30 Treble |
 |
 |
| +30 Bass | -30 Bass |
 |
 |
I can't find a definitive limit for this one either, but sometimes it gets fussy and will break the image even if you're adjusting by very small and reasonable amounts.
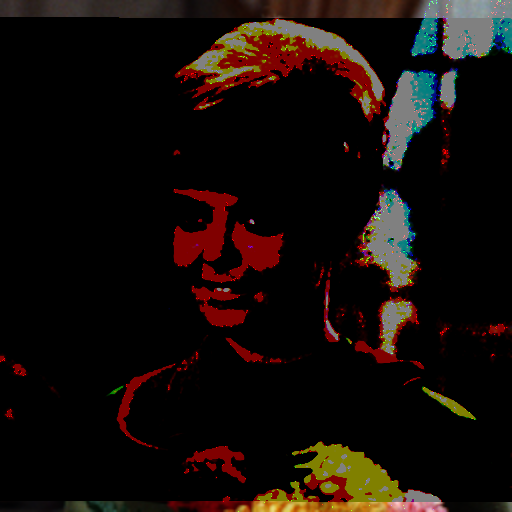
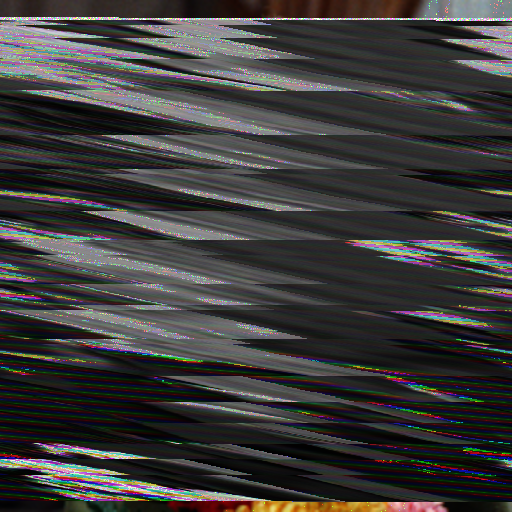
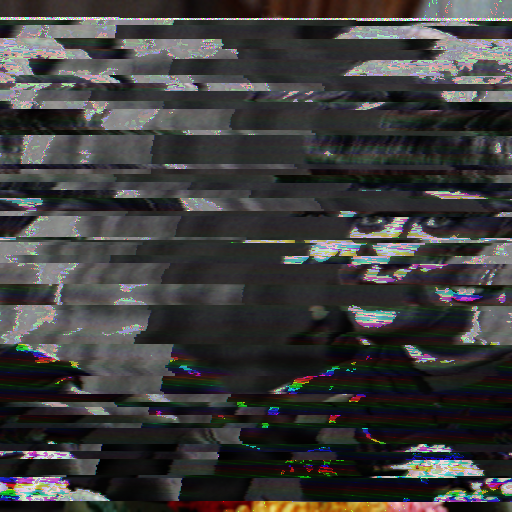
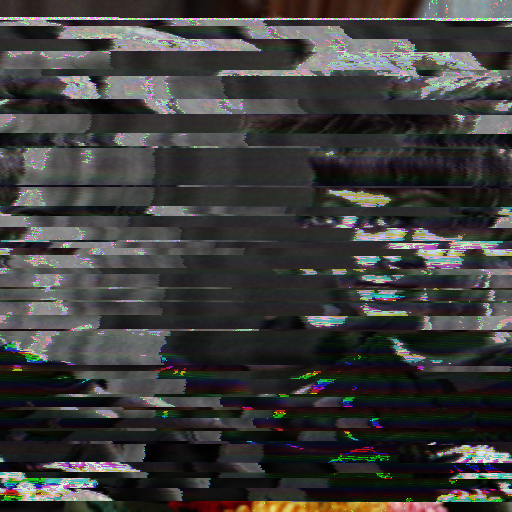
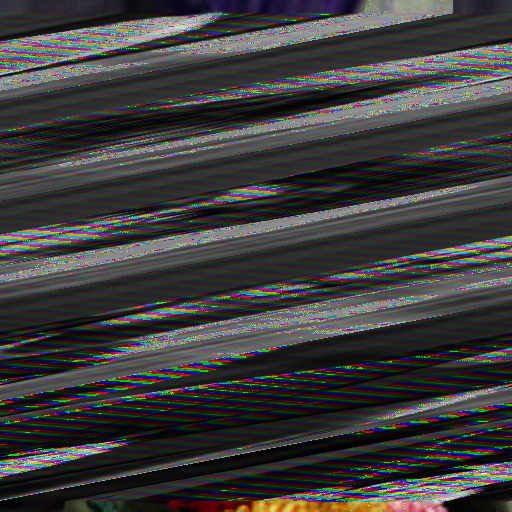
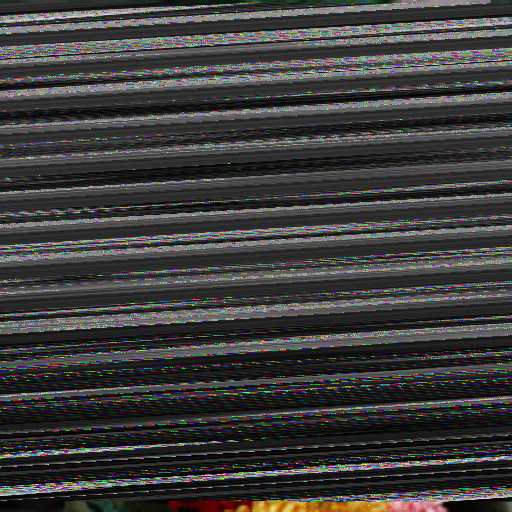
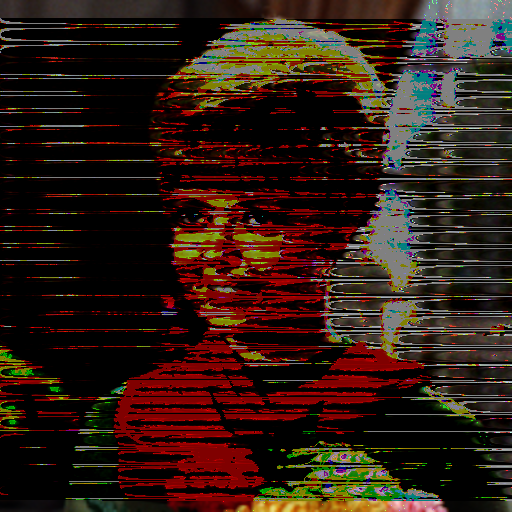
Pitch
Changing pitch fucks up the image very quickly, turning it into grey smears. Increasing makes smears that go south-west, decreasing makes them go north-east.
| +1% | +3% | +10% |
 |
 |
 |
| -1% | -3% | -10% |
 |
 |
 |
Interesting things can happen if you change the pitch in one direction and then immediately move it back. This still makes the image into a bunch of grey blocks, but some of the brightness information is kept intact.
| +1%, then -1% | -1%, then +1% |
 |
 |
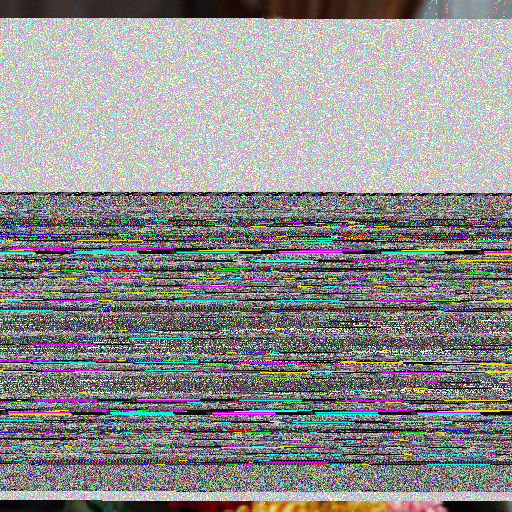
Speed
Increasing speed immediately breaks the file. Decreasing it keeps the file intact, but turns the image into more grey smears.
| -1% | -3% | -10% |
 |
 |
 |
Like with pitch, moving in one direction and then the other results in a more coherent image. Unlike pitch, it doesn't seem to matter which way you go first; I got the exact same file for both options. It has an interesting effect of turning the image greyscale with an overlay of RGB/CMY stripes.
| -1%, then +1% | +1%, then -1% |
 |
Tempo
As with speed, increasing tempo breaks the file immediately, but you can decrease and still get a valid image. The image breaks into a "staircase" of chunks tinted different colors.
| -1% | -3% | -10% |
 |
 |
 |
I was able to get the back-and-forth technique to work going +1 to -1, but not the other way around.
| +1%, then -1% |
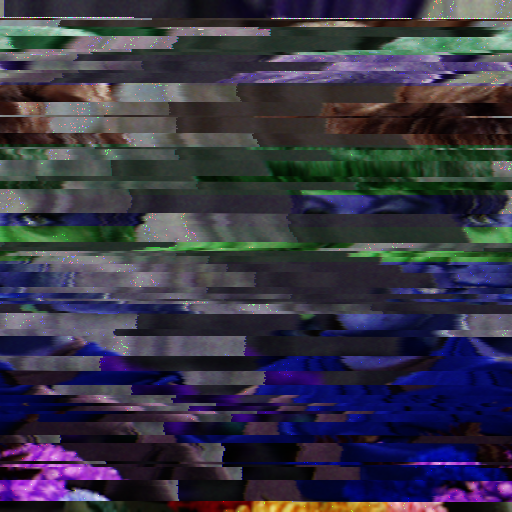 |
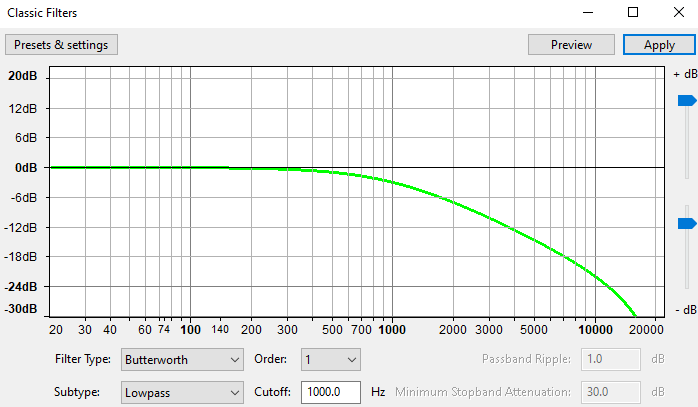
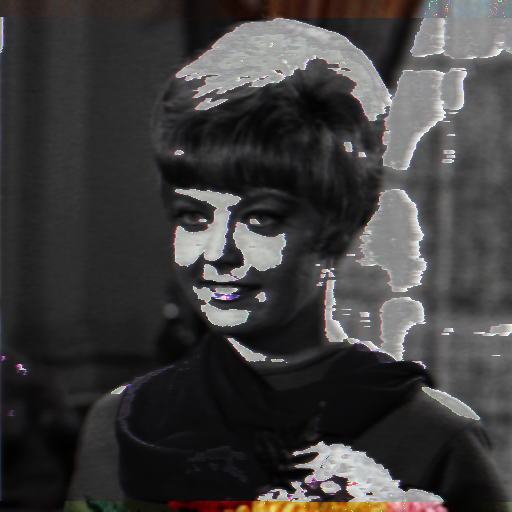
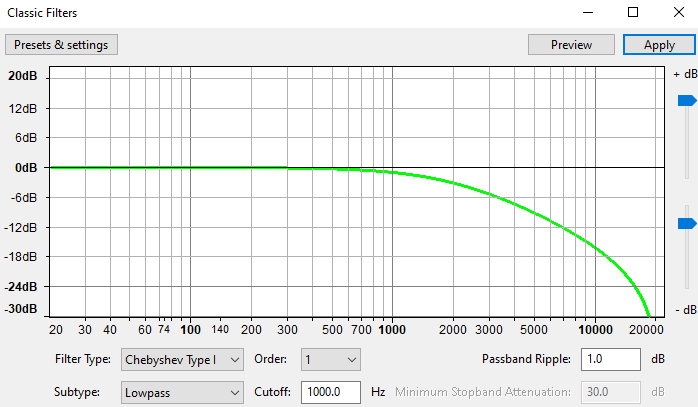
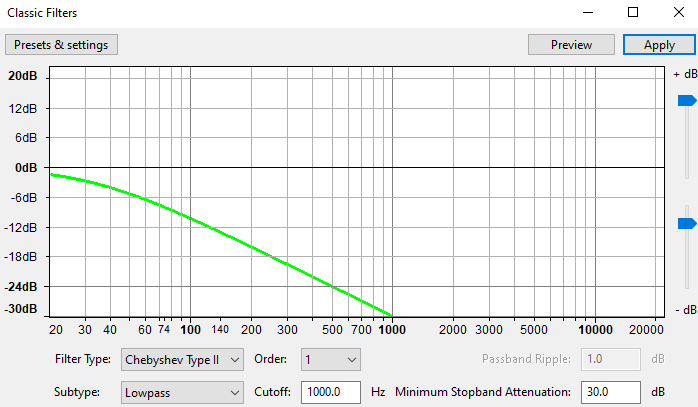
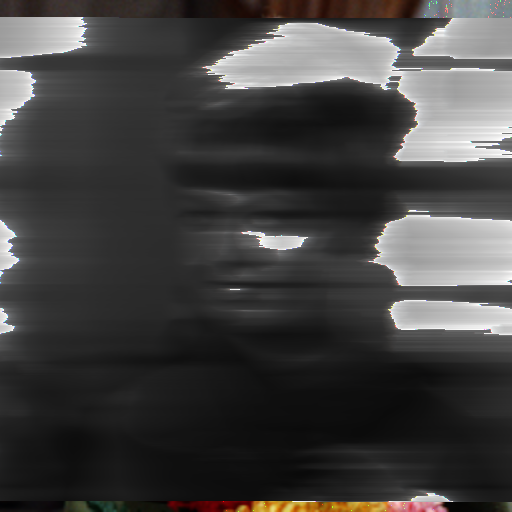
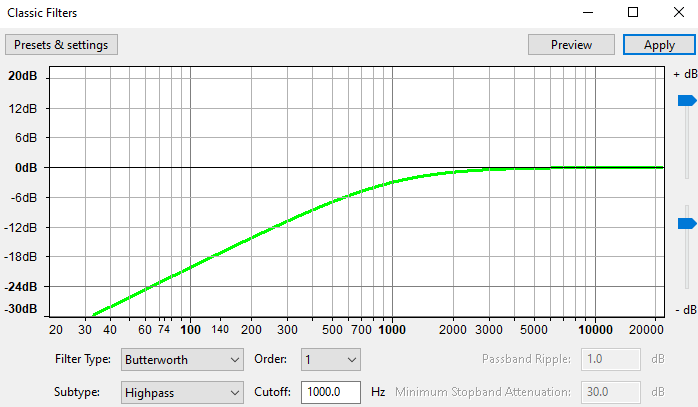
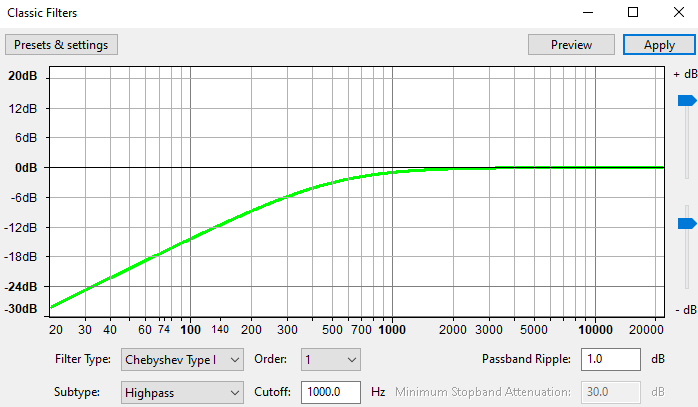
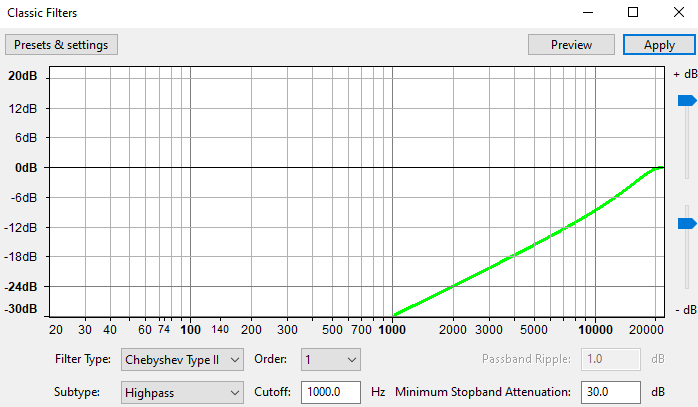
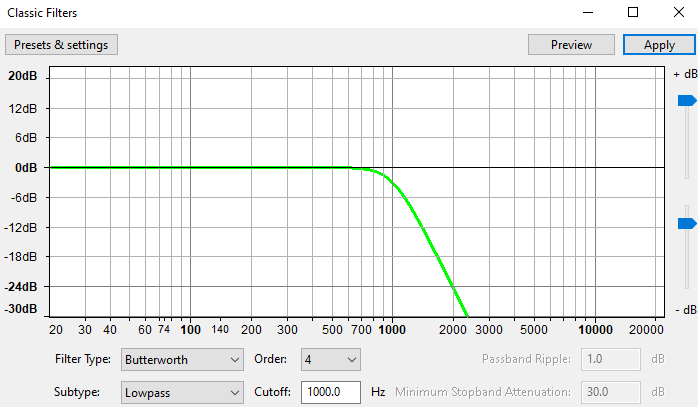
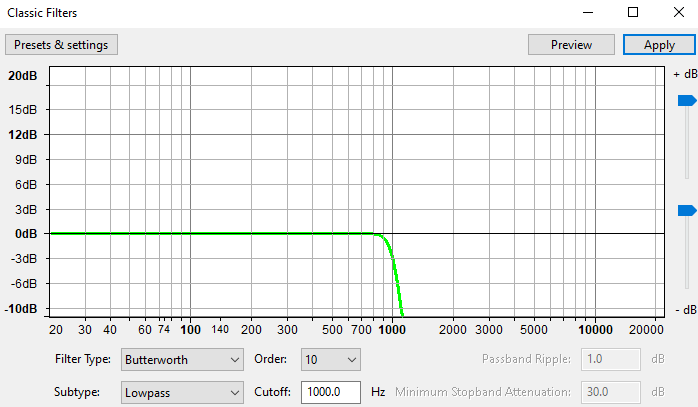
Classic Filters
This one has a lot of parameters you can tweak, so I've included a screenshot of exactly what the effects menu looked like for each trial, which is hopefully easier to parse than just a list of what's in which field.
 |
 |
 |
 |
 |
 |
 |
 |
 |
 |
 |
(corrupted) |
 |
 |
 |
 |
You could fiddle with this a lot more, and I may revisit it some other time to see what else it can do, but for now let's move on.
Click Removal
In order to use this one, you have to tweak the settings to be more sensitive than default, otherwise you'll get an error saying the algorithm didn't do anything to this audio.
| Threshold: 29 Spike Width:20 |
Threshold: 15 Spike Width:32 |
Threshold: 1 Spike Width:40 |
 |
 |
 |
You can re-apply the effect multiple times to get slightly more distortion each time, but trying to stack it too many times can break the image file. You also get diminishing returns as the amount of data that visibly changes gets smaller with every iteration.
| 15/32 | 15/32, 7/40 | 15/32/ 7/40, 29/34 |
 |
 |
 |
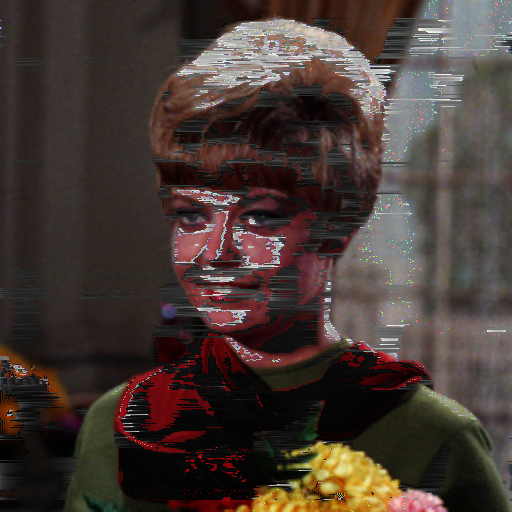
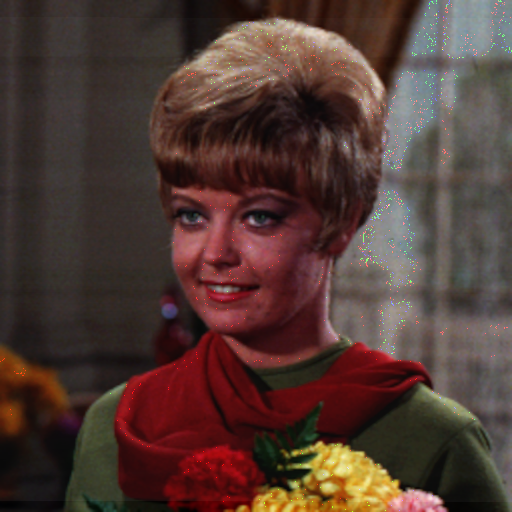
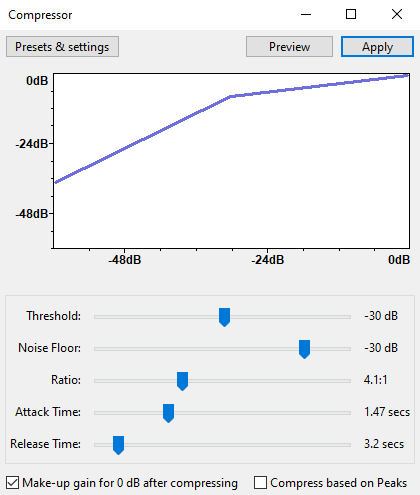
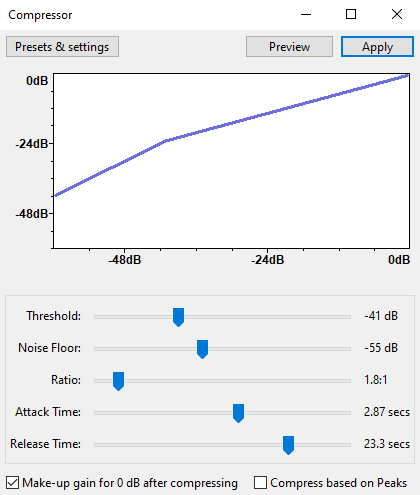
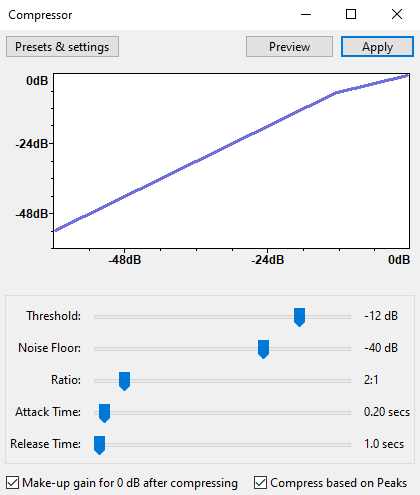
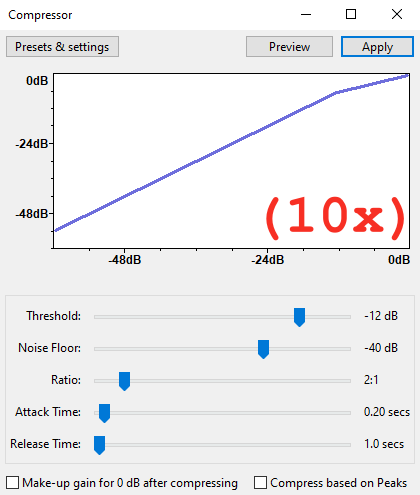
Compressor
Another one with lots of possible adjustments.
 |
 |
 |
 |
 |
(corrupted) |
 |
(corrupted) |
 |
 |
 |
 |
 |
 |
 |
 |
I kept trying this one to see if I could get something cool to happen with the horizontal striping effect, but no luck. Alas, that's science: sometimes your data is actually boring as hell and you have to let it take up space on the website anyway.
direct quote from the ceo of science, btw
Distortion
This is, as they say, "the big guns." There are so many parameters to tweak, we could be here for hours. Instead, I've just documented the results for most of the "factory preset" options.
| Default |  |
Hard clip |  |
| Soft clip |  |
Fuzz Box | 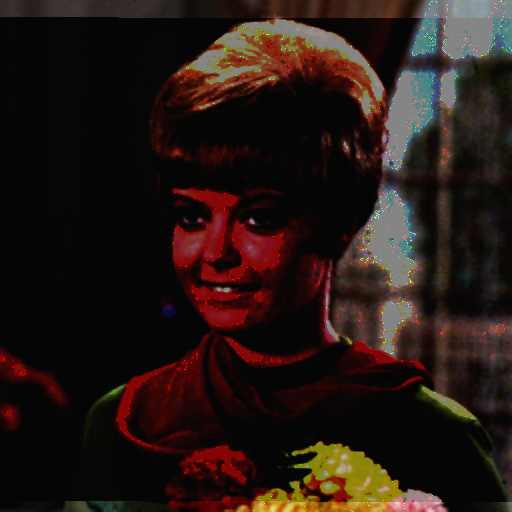 |
| Walkie-talkie | 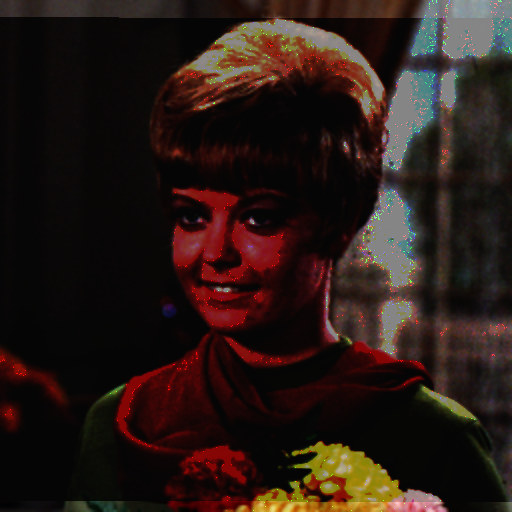 |
Blues drive sustain |  |
| Light Crunch Overdrive |  |
Heavy Overdrive |  |
| 3rd Harmonic | 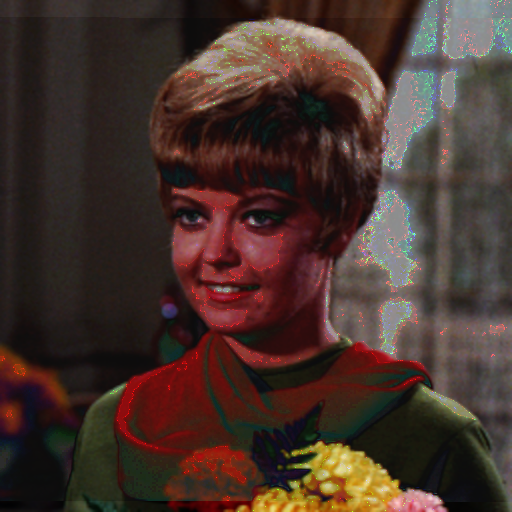 |
Valve Overdrive | 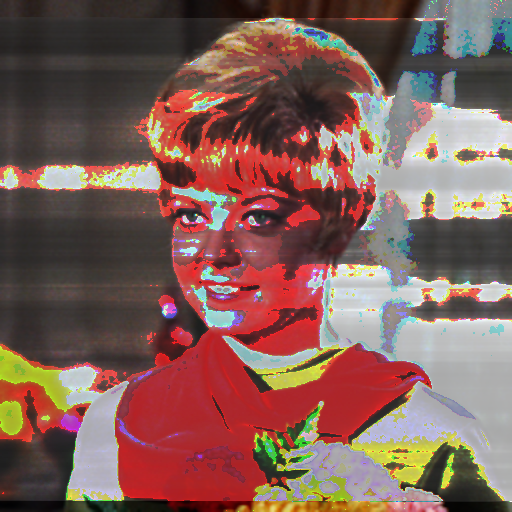 |
| 2nd Harmonic |  |
Gated Expansion Distortion | 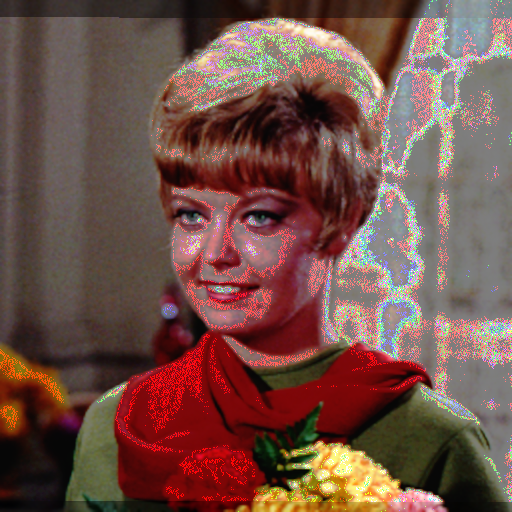 |
| Leveller, Light |  |
Leveller, Heaviest | 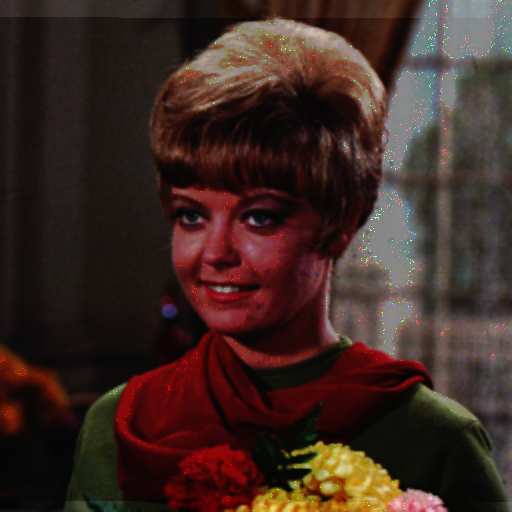 |
| Half-Wave Rectifier | 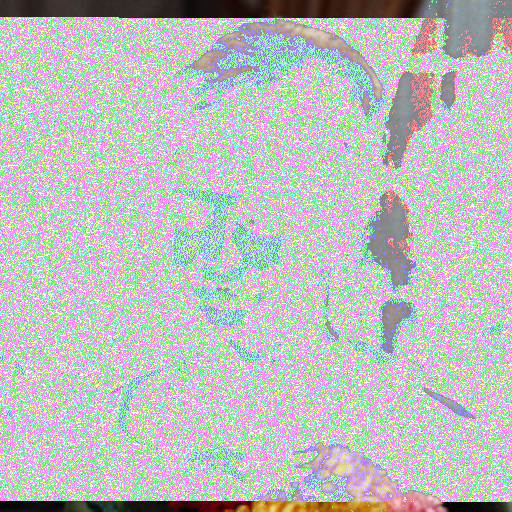 |
Full-Wave Rectifier |  |
| Full-Wave Rectifier (DC Blocked) | 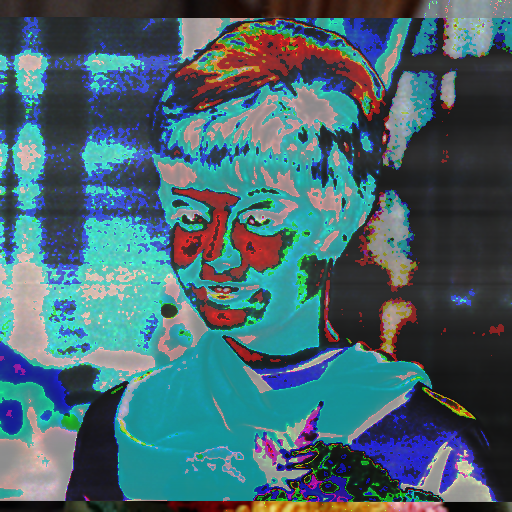 |
Percussion Limiter |  |
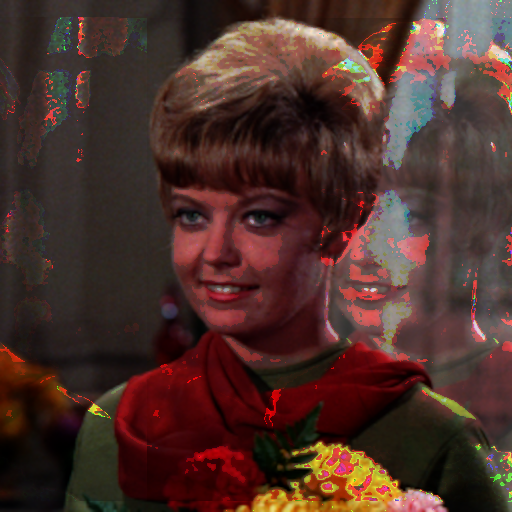
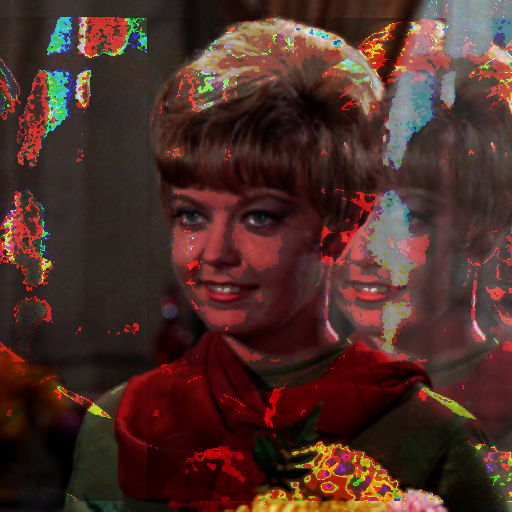
Echo
Echo creates ghostly duplicates of image parts, which is one of my favorite effects. Changing delay time adjusts the position of the echoed image, and decay factor makes it more intense.
| Delay time: 0.01 Decay factor: 0.1 |
Delay time: 0.1 Decay factor: 0.1 |
Delay time: 1 Decay factor: 0.1 |
 |
 |
 |
| Delay time: 0.01 Decay factor: 0.2 |
Delay time: 0.01 Decay factor: 0.4 |
Delay time: 0.01 Decay factor: 0.8 |
 |
 |
 |
Filter Curve EQ
Another one where I'm just going to run through the included presets.
| 100Hz Rumble | 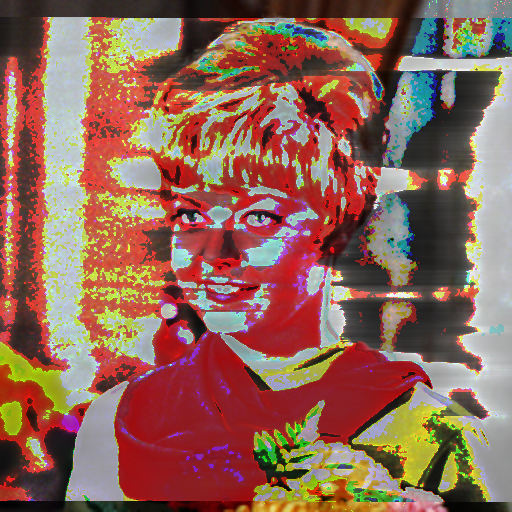 |
| AM Radio | 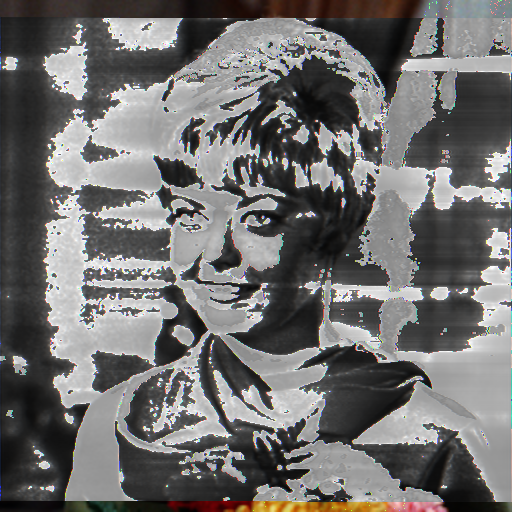 |
| Bass Boost |  |
| Bass Cut | 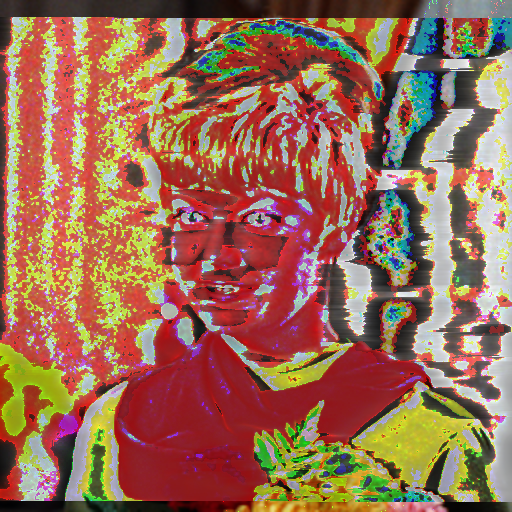 |
| Low rolloff for speech | 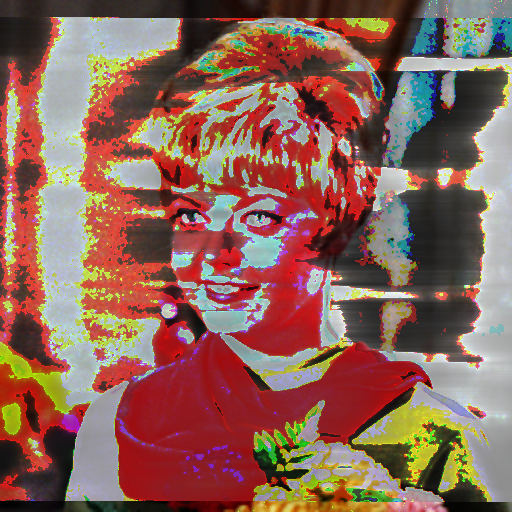 |
| RIAA | 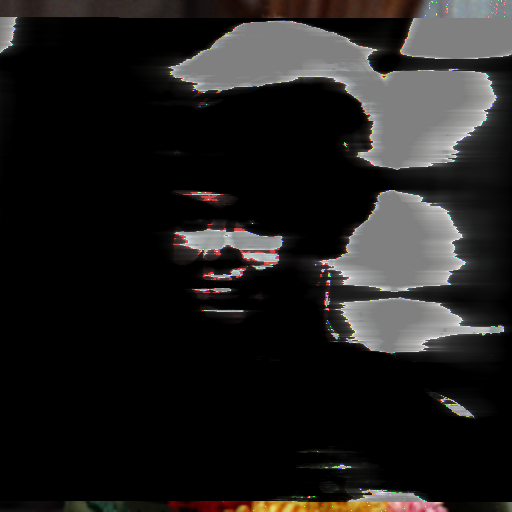 |
| Telephone | 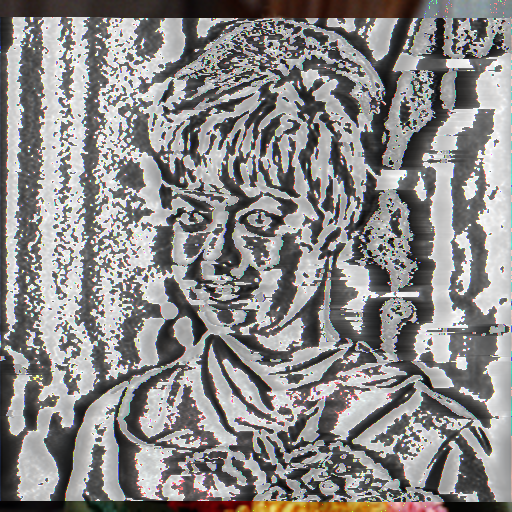 |
| Treble Boost | 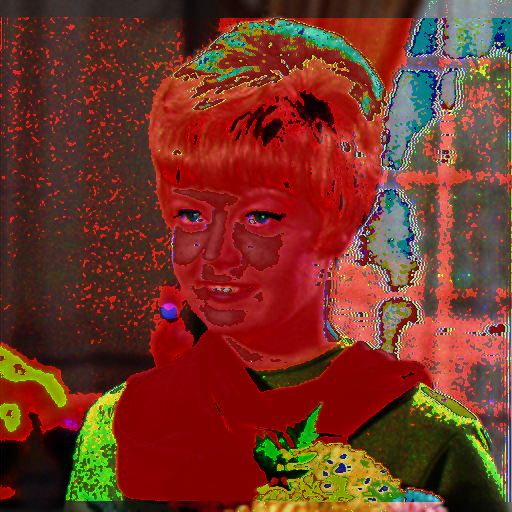 |
| Treble Cut | 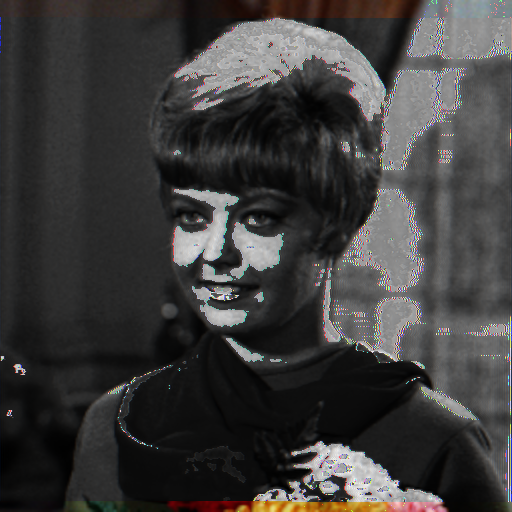 |
| Walkie-talkie | 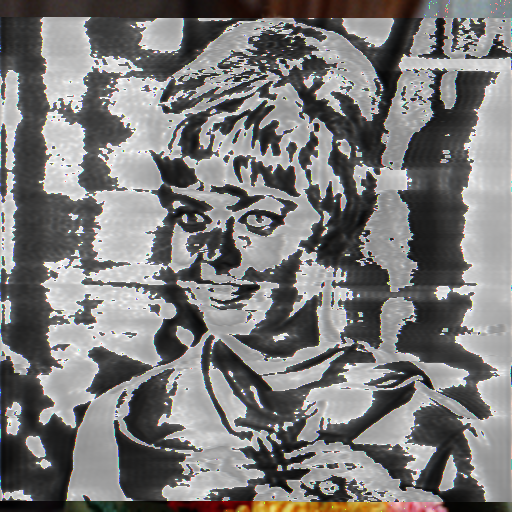 |
Invert
Change of pace: this one has no settings, no adjustments, no tweaks, et cetera. You press the button and it inverts the waveform. Snappy!
 |
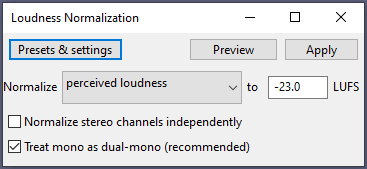
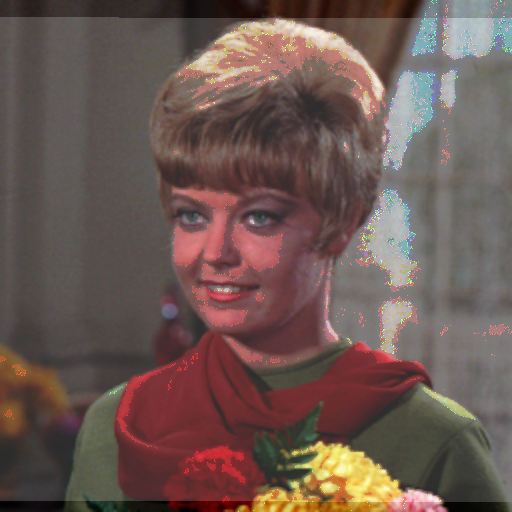
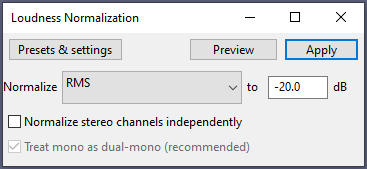
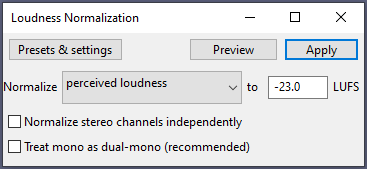
Loudness Normalization
And we're back to stuff with checkboxes and dropdown menus and shit. This one isn't very exciting, though. I tried three permutations of options and the results were almost identical. As far as I can tell, loudness normalization is functionally identical to a negative amplify.
 |
 |
 |
 |
 |
 |
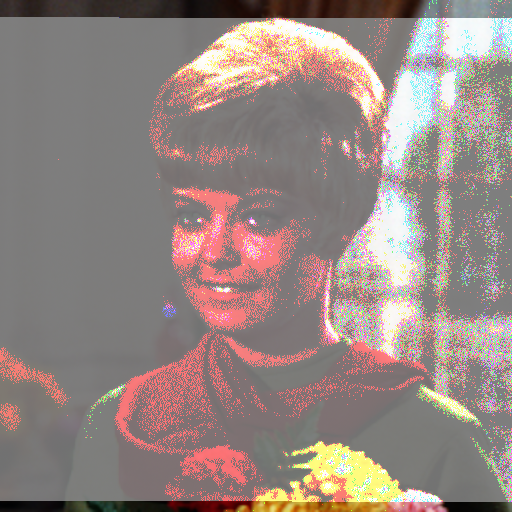
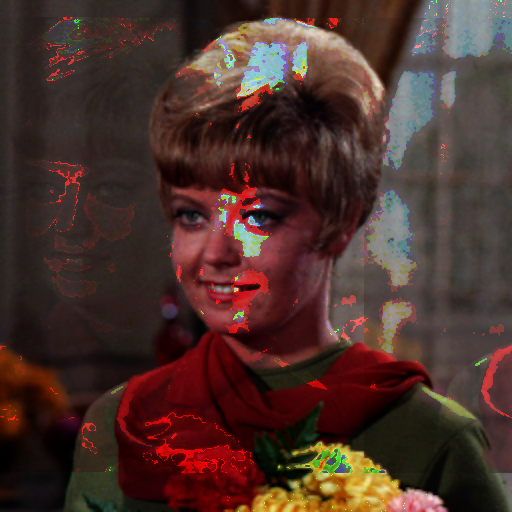
Noise Reduction
The first time you open this effect panel, the bottom section will be greyed out until you give it a "noise profile".
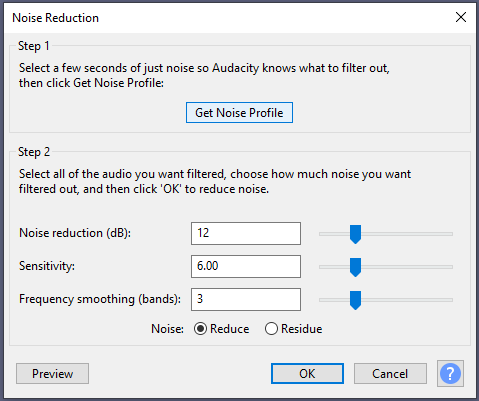
this is what it looks like not greyed out, because i forgot to get a screenshot of that
It says to select a few seconds of "just noise". For the first trial with this one, I kept the selection area where it had been for all the other effects -- essentially, the entire "working area" -- and proceeded with the default settings. Here's how that turned out:
 |
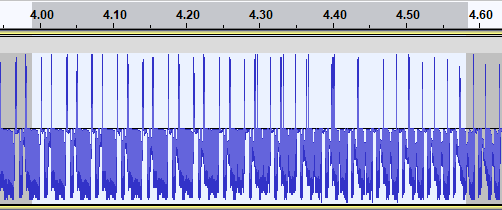
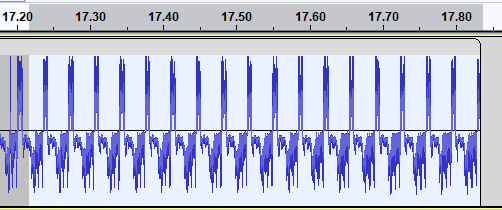
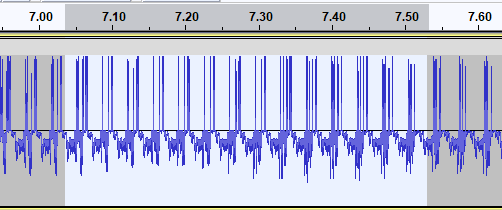
Nothing special. It looks pretty much like another negative amplify. I didn't bother testing various settings for that noise profile, and instead went back and selected a different area, specifically a little plateau between 11 and 12 seconds.
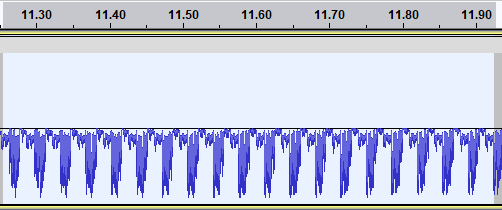
here's a little behind-the-scenes secret: the waveform in the "importing" section isn't actually from "female". i originally used a different test image, but that ended up being weirdly volatile and not working very well, so i stuck to "female" for all the example images.
Then I re-selected the whole working area to apply the actual noise reduction effect. This had a much more interesting outcome:
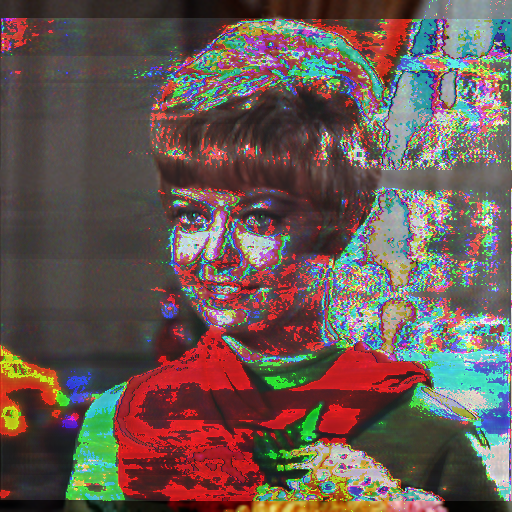 |
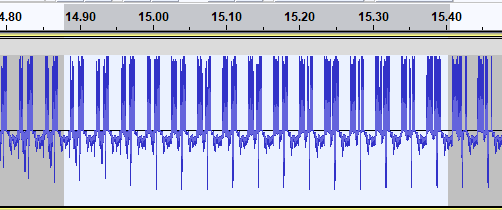
So, instead of fiddling with sliders, I tested the range of this effect by selecting different areas for the noise profile, aiming for different "textures" in the waveform. I've included a screenshot of the selected noise profile area to go along with each image here.
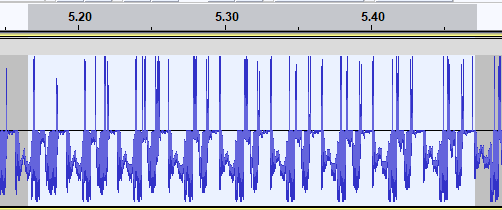 |
 |
 |
 |
 |
 |
 |
 |
 |
 |
 |
 |
Okay, now these are fun. This is one I'd highly encourage you to play around with, especially if you have a larger file with lots of differently-shaped areas to pick your noise profile from.
Normalize
These are all done with "Remove DC offset" checked. The effects are much less pronounced if you turn that off.
| Peak amplitude: -1 dB | Peak amplitude: -3 dB | Peak amplitude: -10 dB |
 |
 |
 |
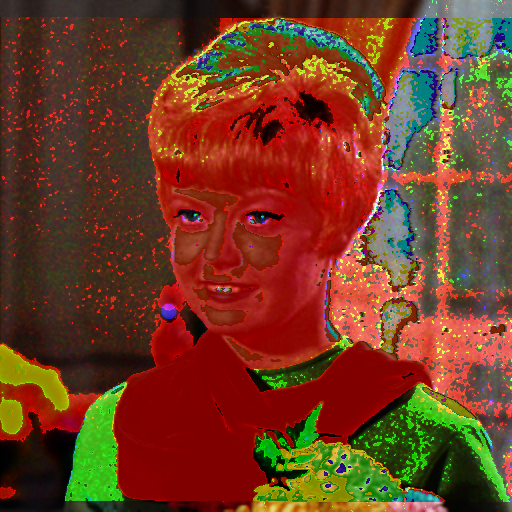
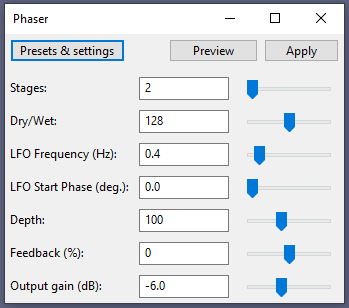
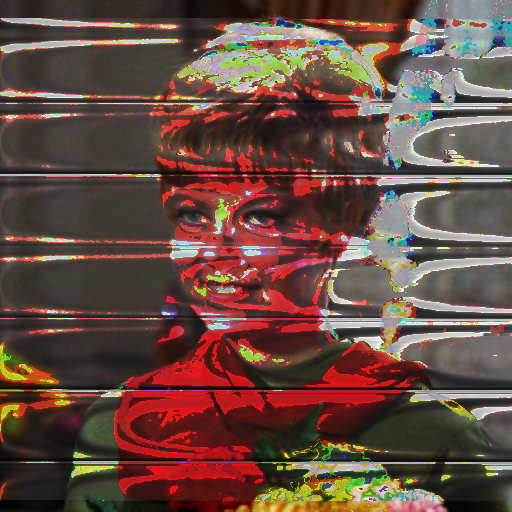
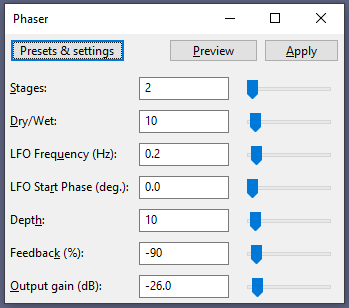
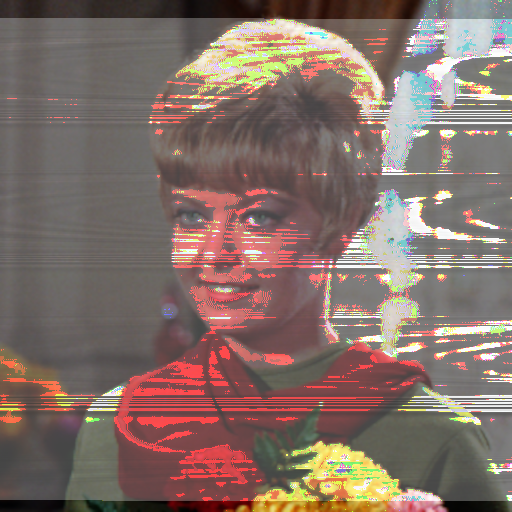
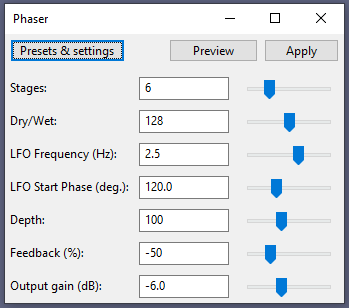
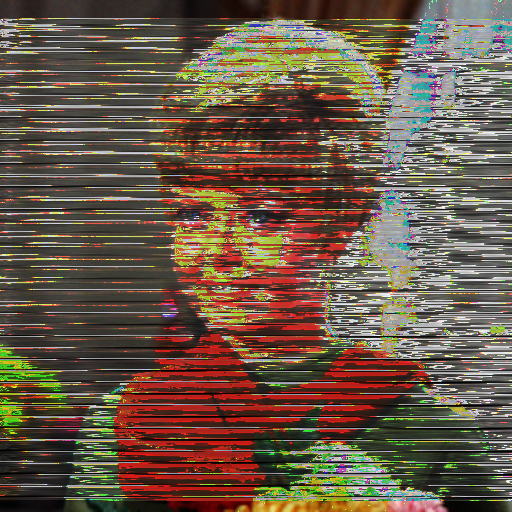
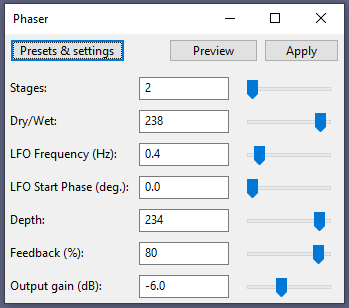
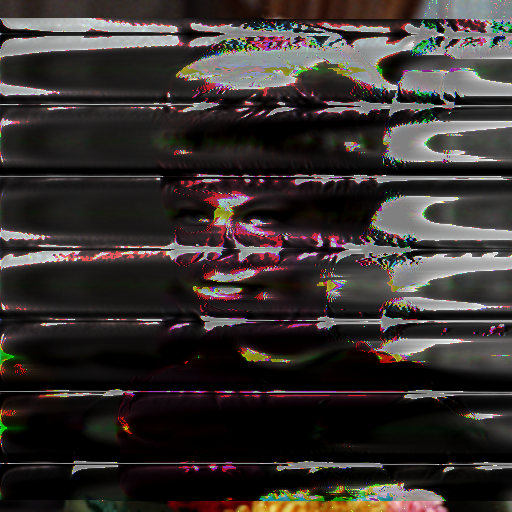
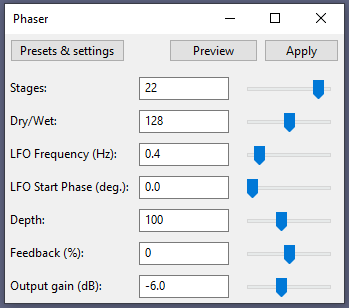
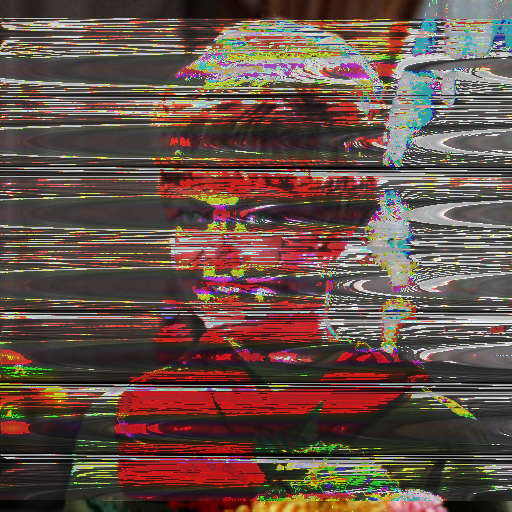
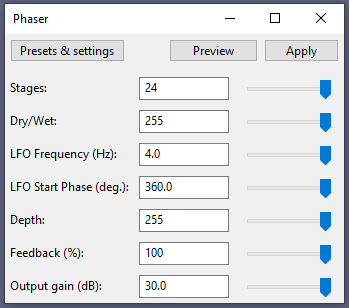
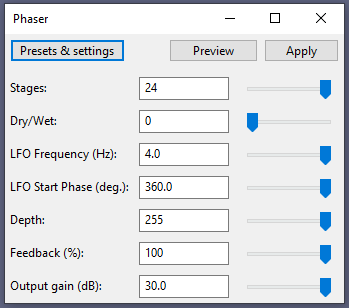
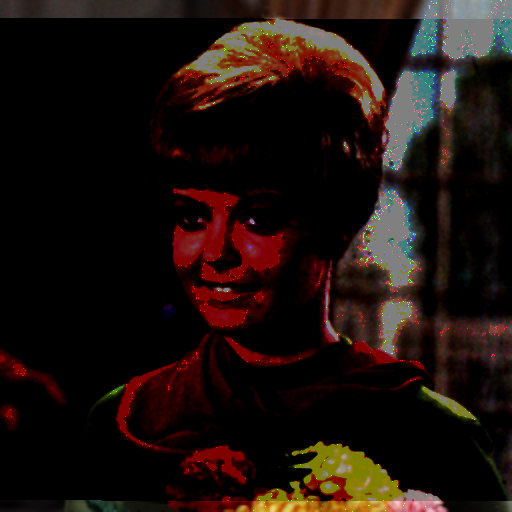
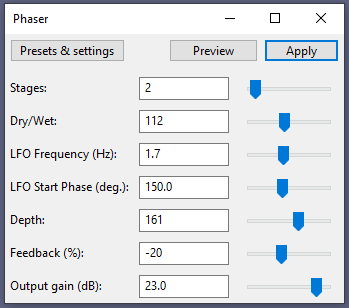
Phaser
This one is really cool, and it also has a whole bunch of options to tweak.
 |
 |
 |
 |
 |
 |
 |
 |
 |
 |
 |
 |
 |
 |
 |
 |
Reverb
Another one of my favorites. Also has a lot of options to poke at, but here are the results for all the factory presets.
| Default | 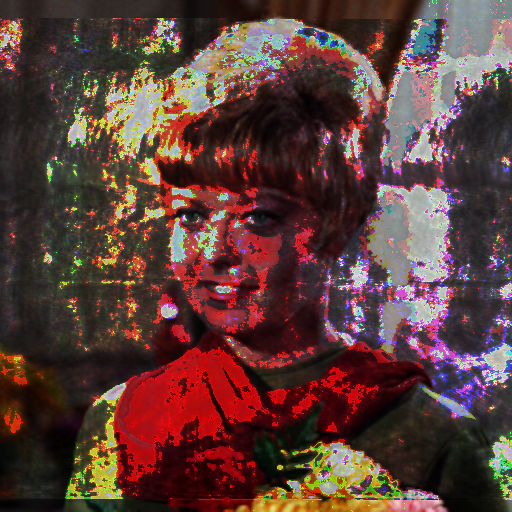 |
Vocal I | 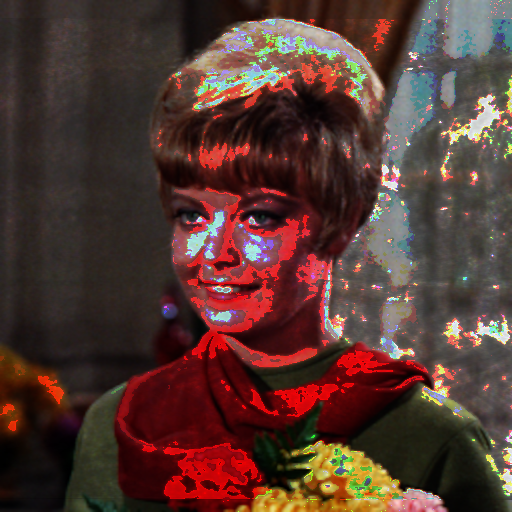 |
| Vocal II | 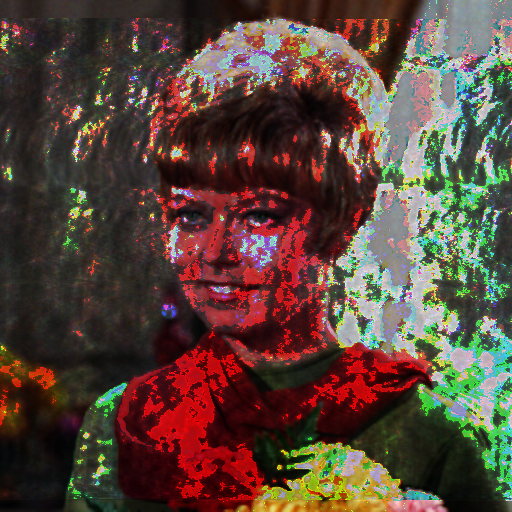 |
Bathroom | 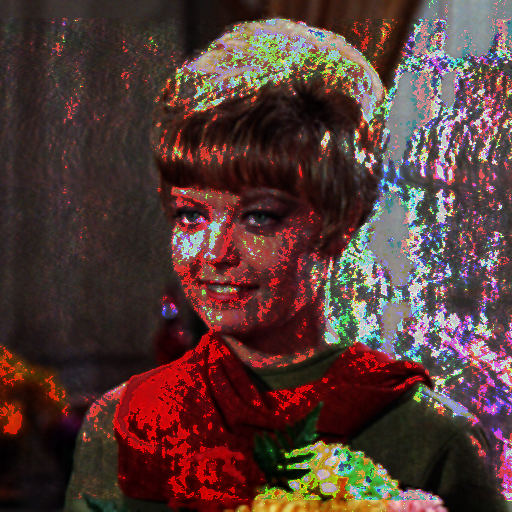 |
| Small Room Bright | (corrupted) | Small Room Dark | 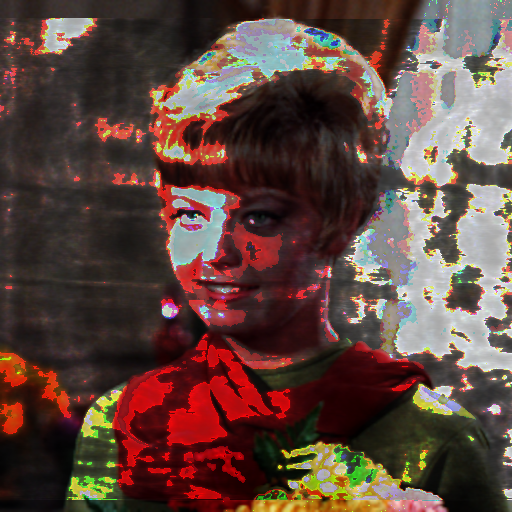 |
| Medium Room | 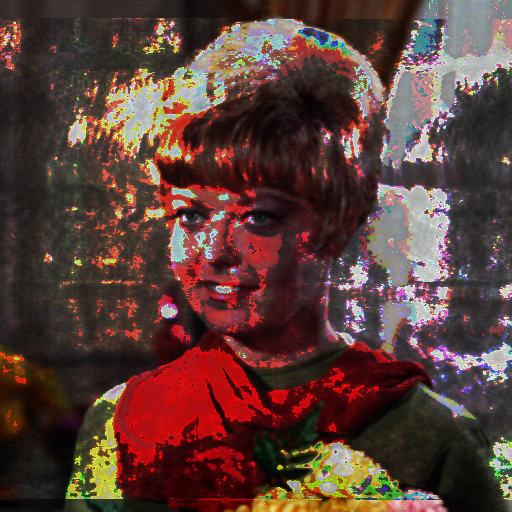 |
Large Room | 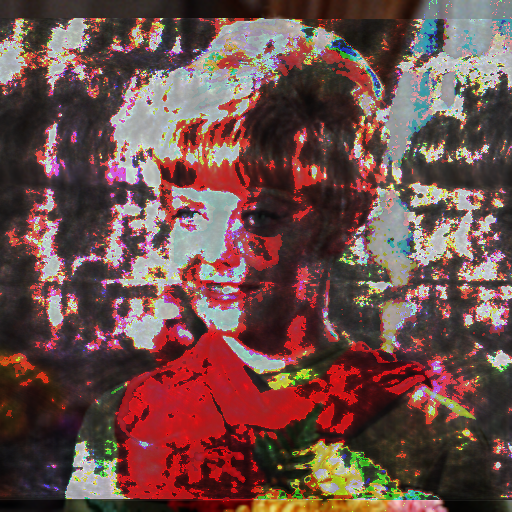 |
| Church Hall |  |
Cathedral | 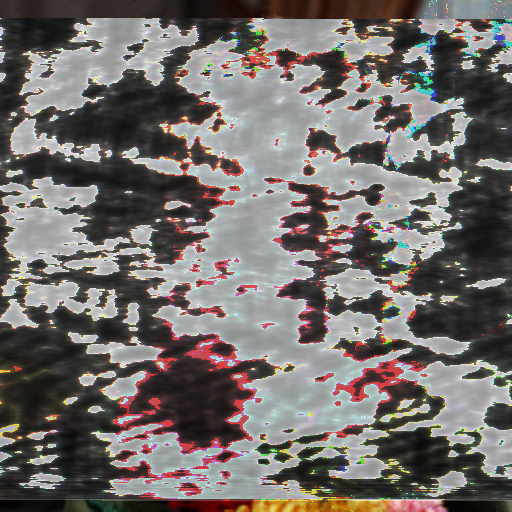 |
Reverse
Like Invert, this is a one-shot.
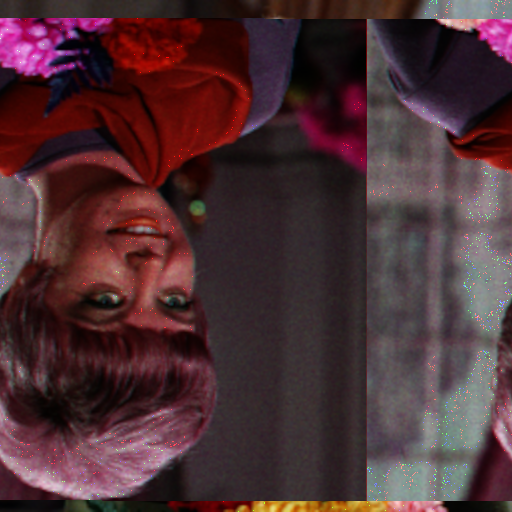 |
Surprise! It's upside-down and backwards. How unexpected.
What's actually unexpected is how this affects the colors. I would've expected them to either not change at all or to be completely inverted. Instead, the reds haven't changed at all, and green and purple have swapped places. The wrap-around displacement of the picture is also interesting, but I think that's easier to account for than the color thing.
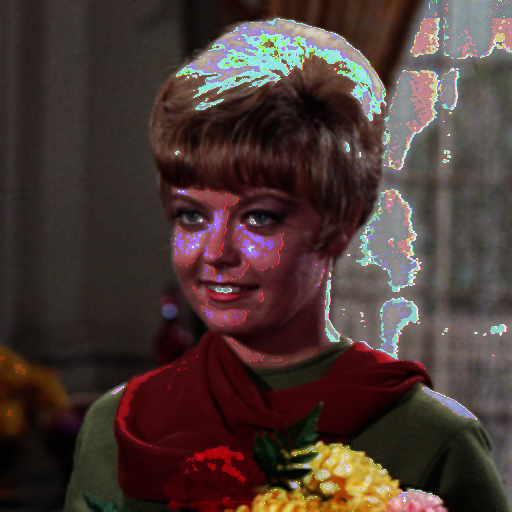
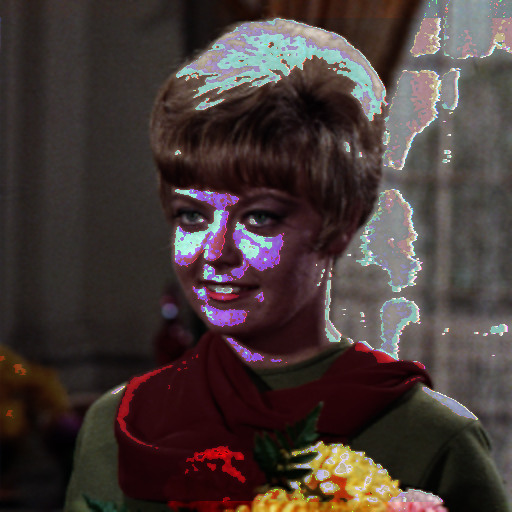
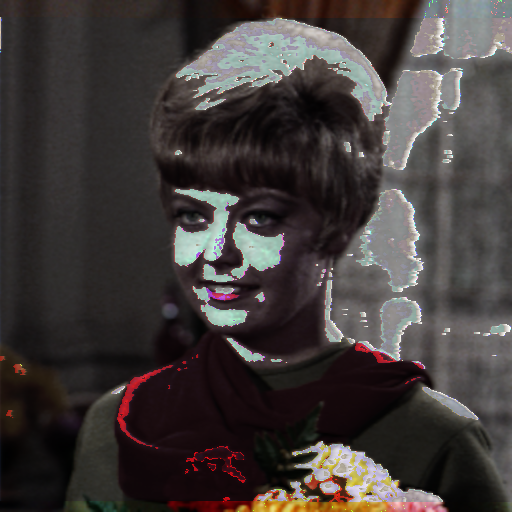
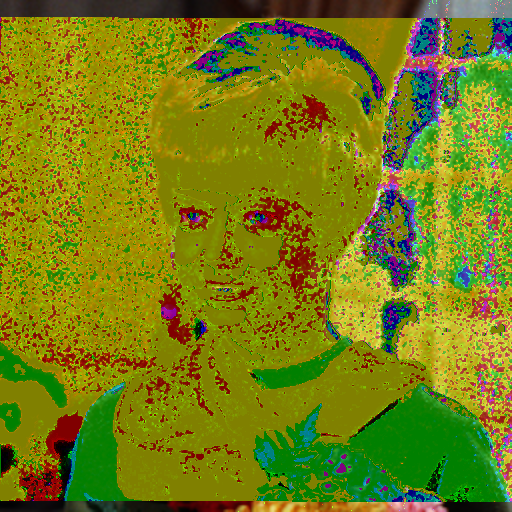
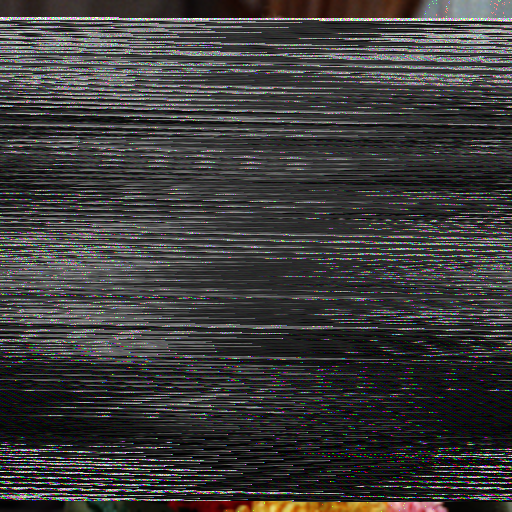
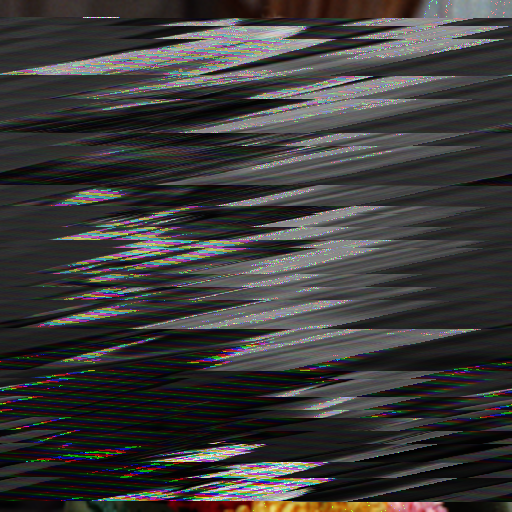
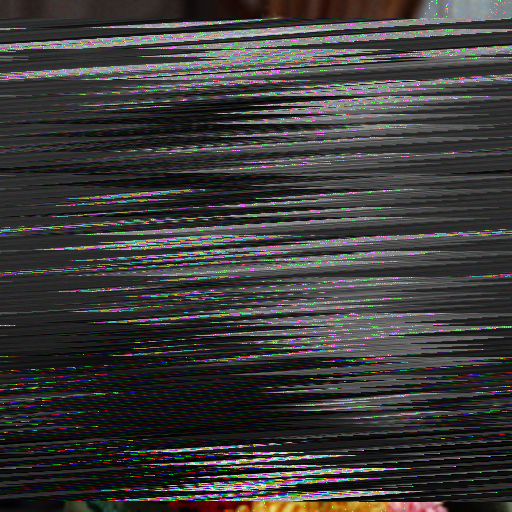
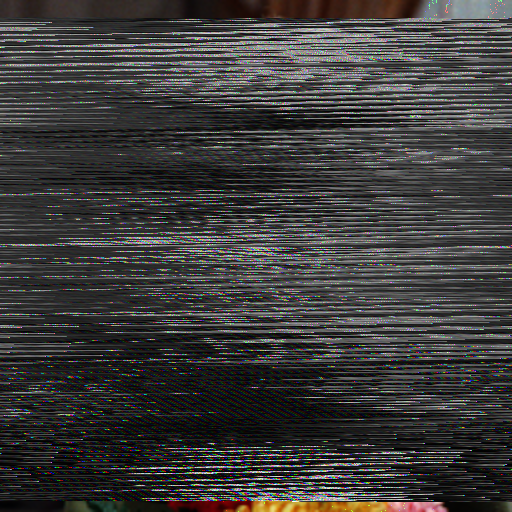
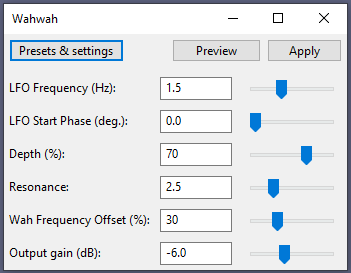
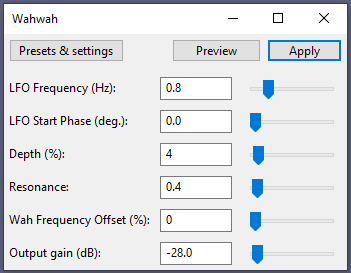
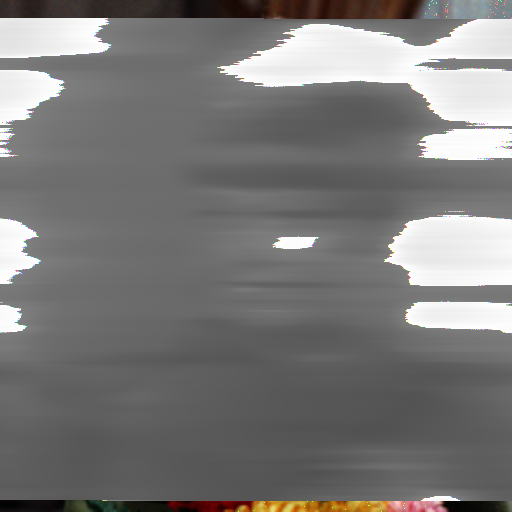
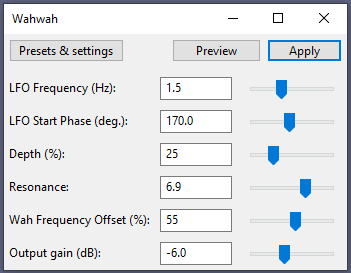
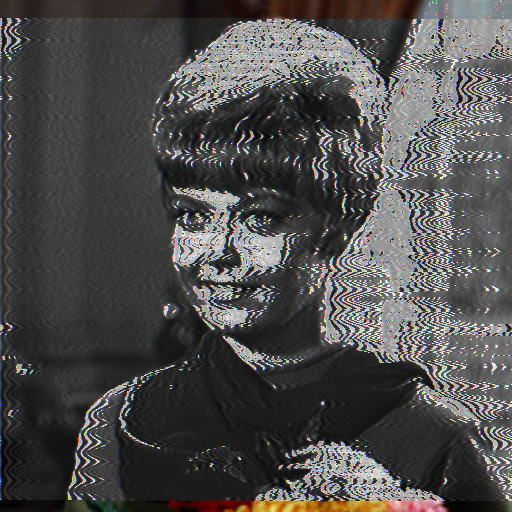
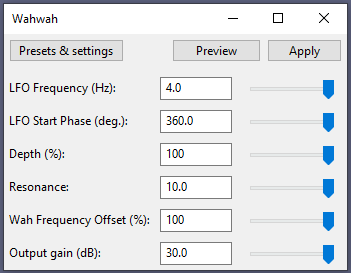
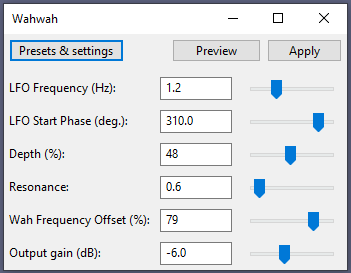
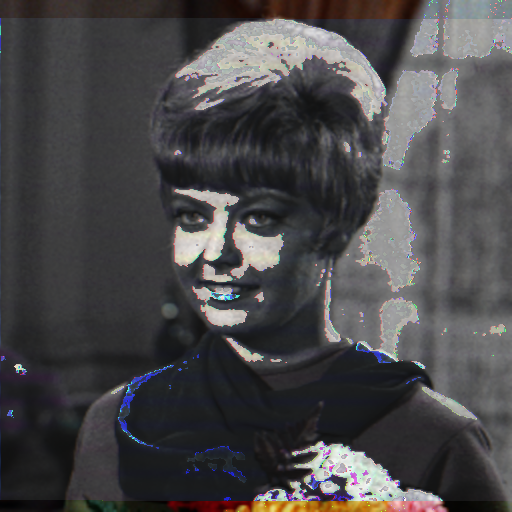
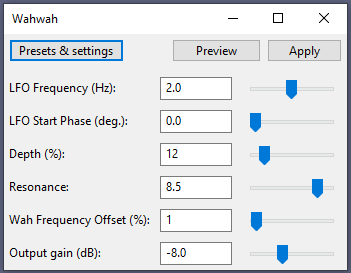
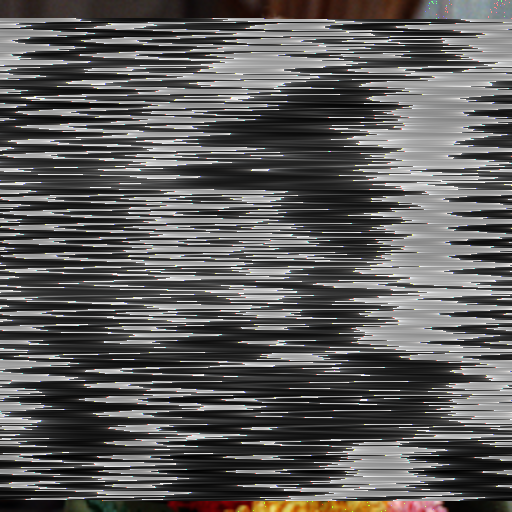
Wahwah
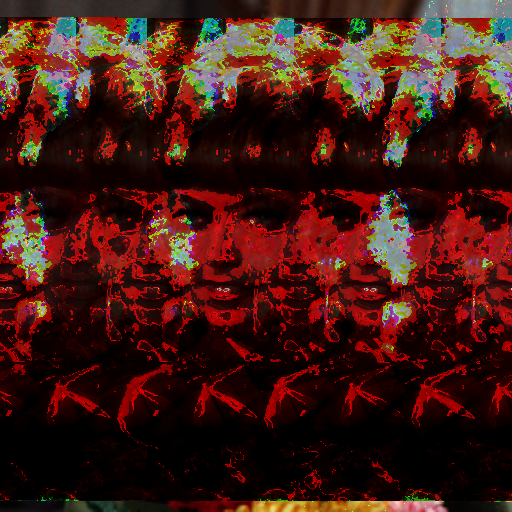
Wahwah makes some of my absolute favorite distortions. I really love the greyscale smearing and wavy lines this can spit out. Visually, it's a little similar to phaser, but wahwah tends to keep the essential shape of the image more intact while phaser just writes over it.
 |
 |
 |
 |
 |
 |
 |
 |
 |
 |
 |
 |
And with that, we've reached the end of the standard effects menu. There are plenty left in the plugins section, some of which do come included when you download Audacity, but they're not "core" features of the program. But there are still a few more things you can do to your data that don't involve the effects menu at all!
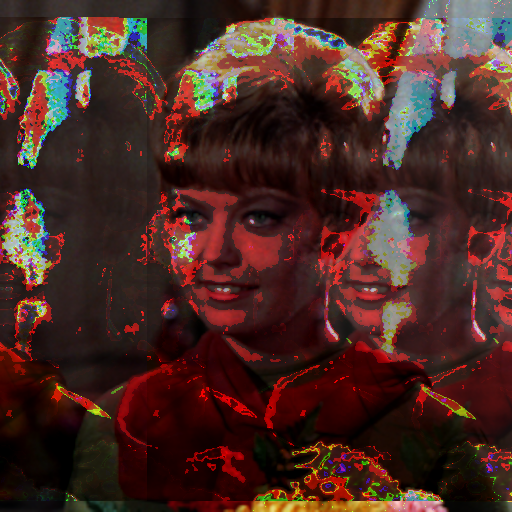
Merging Tracks
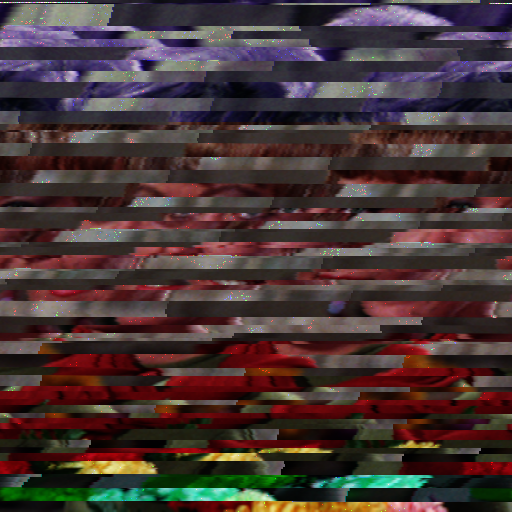
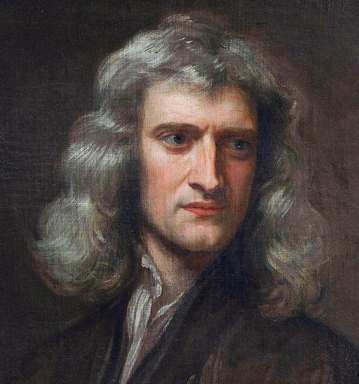
You aren't limited to playing with just one file at a time. You can also smash them together to see what happens! You can combine image data with other images, normal audio, or other kinds of files imported via the "raw data" option. I'm going to bring in a perennial favorite of mine, which I've saved as a .bmp using exactly the same steps as before.
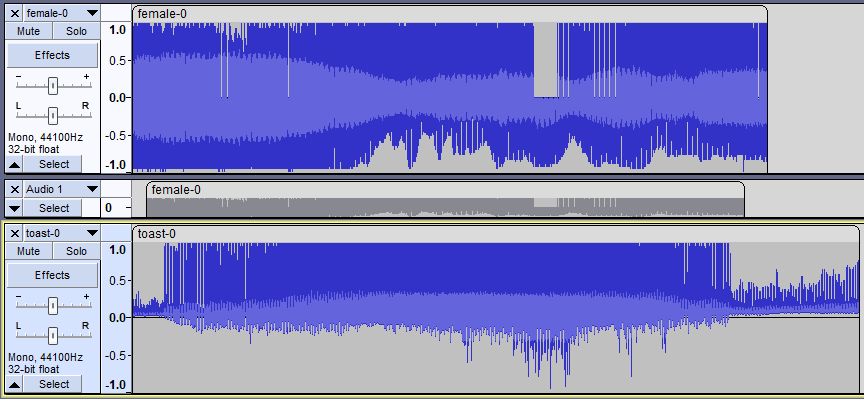
the greyed-out track in the middle is what i've been using to mark my working area on the top track, taking advantage of audacity's selection snapping features.
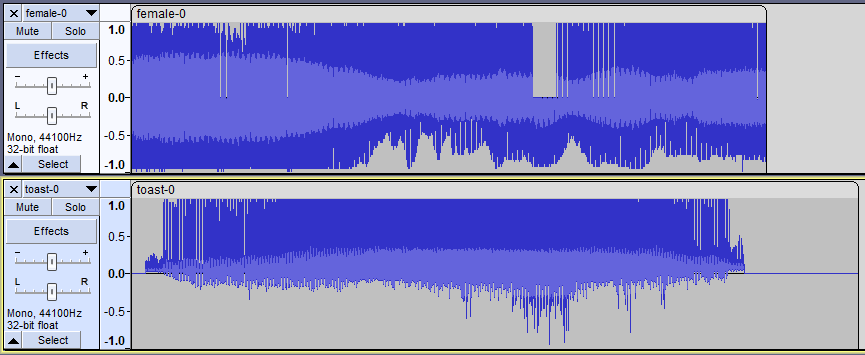
"Toast" is a larger image (640x469) which manifests as a longer runtime. In order to merge it with "Female", I'm going to select an area of "Toast" equal in length to the working area of "Female", and replace the rest of the track with silence.
Then, click and drag to select the entirety of both tracks. Select Tracks > Mix > Mix and Render...
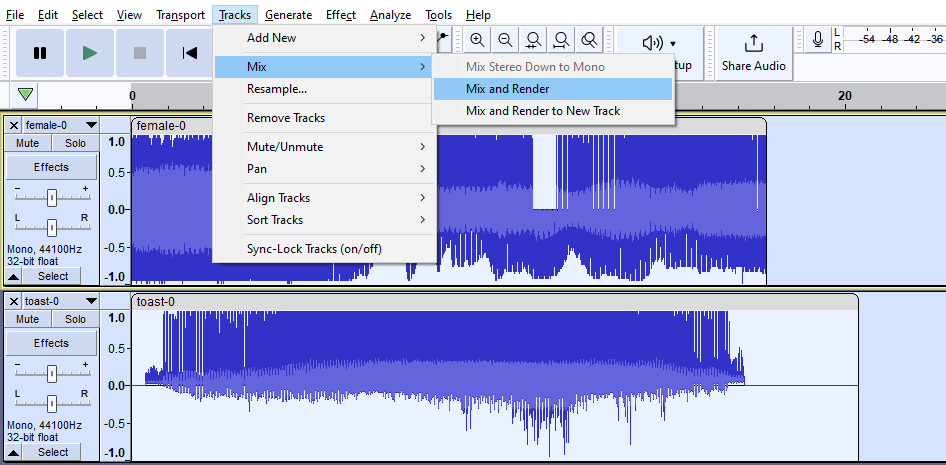
And it will, as promised, combine the two tracks into one.
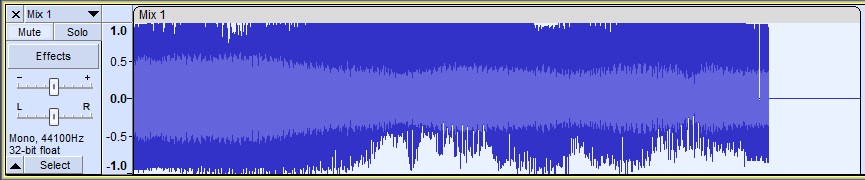
Export this new track just like the others, and now I have a beautiful Toast-Female hybrid:
Well, okay, it clearly got most of its genes from "Female", but you can see the ghostly edges of "Toast" floating over either side of her face. This is a straightforward total merge. You can also clip small segments of the second image to merge with the first, for a less "all-encompassing" result.
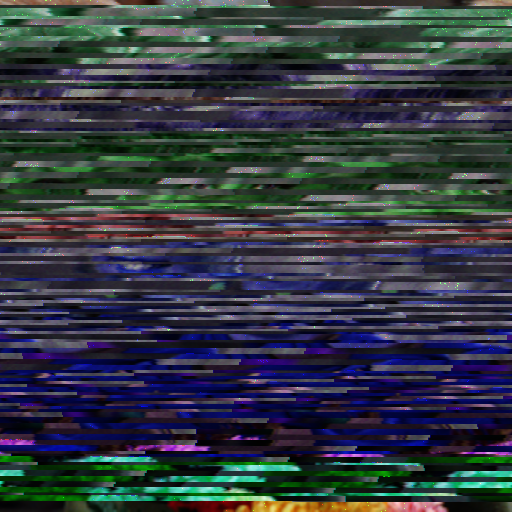
So that's images. But what if we used this audio editing program to edit... audio? You can import a normal audio file and merge it with the image data using the same process (trim to length, mix and render to new track) -- make sure you mix down your audio from stereo to mono before merging it with the image data! Here's the result of merging a section of an .mp3 of Bacalao - I'm Still Alive into "Female":
"Alright, Quadriformis Dot Net," you say. "I understand that images can be audio, and that audio can also be audio, so what's left? What else can possibly be audio?" The answer, my friend, is "anything."
Audacity is a beautiful machine that you can feed basically any computer file into and it will dutifully render it as audio. Using "raw data" import settings, you can put all kinds of stuff into it and get audio that you can then turn into images.
This is a .kra file of some RPGMaker assets. We can combine it with "Female" as per usual:
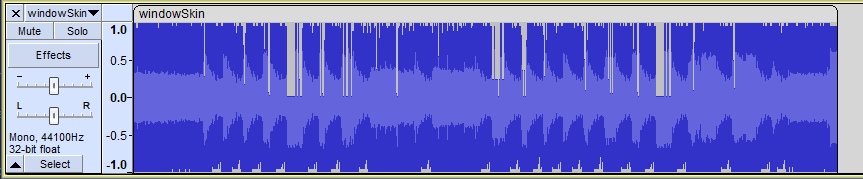
Or, if we're feeling a little rebellious, we can cut everything out of "Female" except the very beginning and ending (where the data that tells the computer "this is an image!" is stored) and paste the entirety of windowSkin.kra in between them, which gives us a representation of just the .kra file as an image.
This is a way to turn raw data into an image using audio as a transitional medium, which I think is cool as fuck. I love playing around with raw data imports and have amassed quite a collection of various file types that turn into different kinds of sounds/images. I will probably make another article all about that kind of stuff eventually.
SOME FINAL EDITORIALIZING
Documenting this stuff was pretty fun, even though it was at times extremely tedious. If I were stronger-willed and more computer savvy, I would go even further in mapping out the correlations between waveform and image data -- I'm sure there is some way to algorithmically pin down the exact relationship between the two -- but,,, I'm just here to made weird images, man. This guide is for glitchcore artists, not compsci majors. That said, if you have any insight into the mathematical side of this that you think merits inclusion in this article, don't hesitate to send it my way. It's probably very interesting, I'm just not of the mind to figure it out myself.
I may, at some point in the future, make further explorations into Audacity databending, like testing out plugin effects or trying to bend different file types, but I'm calling it good for now. For the purposes of making glitch art, this covers the fundamentals, and there's only so far rigorous documentation can take you in making cool stuff that doesn't suck to look at. Also, I hope at least a little bit of the mystery of databending persists -- I think it's an essential part of the aesthetic, relying on the inscrutable inner workings of computers to make something distinctly non-human, something humans struggle to accurately replicate or predict... I don't want it to ever be totally solved, even though I think experimenting with it is fascinating. Sorry to get all ideological right at the end of this very long page. I guess my final point is: watch this space for future expansions on databending from the perspective of a guy who knows just enough about computers to know he doesn't actually know fucking anything about computers.